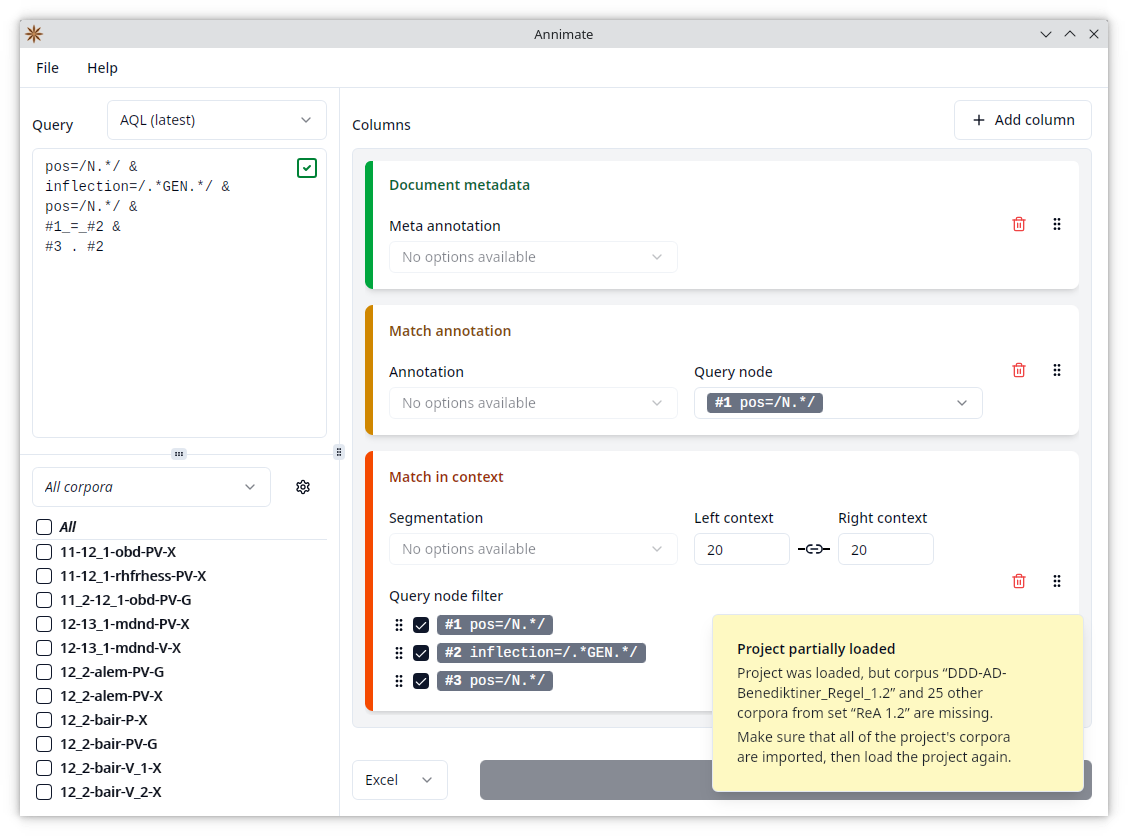
 Annimate
Your Friendly ANNIS Match Exporter
Annimate (for ANNIS Match Exporter) is a tool for the convenient export of query results (matches) from the ANNIS1 system for linguistic corpora.
It is meant as a supplement to the ANNIS web interface and focuses on file export (as opposed to visualization) of the results of an ANNIS query.
Annimate is being developed by Matthias Stemmler in cooperation with the Lehrstuhl für Deutsche Sprachwissenschaft at the University of Augsburg.
It is based on the graphANNIS library by Thomas Krause.
Annimate can produce a CSV or an Excel file with one row per match, showing the matched nodes in their context in a KWIC (Key Word in Context) format as well as additional annotations of the matched nodes and metadata on the corpus and document levels. It is similar in functionality to a combination of the ANNIS TextColumnExporter and CSVExporter, but provides a friendlier user interface.
This User Guide explains the details on how to work with Annimate.
Table of Contents
- Installation
- Importing Corpus Data
- Exporting Query Results
- Working With Projects
- Troubleshooting
- Links
If you are unfamiliar with Annimate, we recommend that you go through all sections one by one, starting with Installation.
Feedback
If you have any kind of feedback on Annimate such as a bug report, documentation issue or idea for a new feature, please create an issue in the Annimate GitHub repository.
-
Krause, Thomas & Zeldes, Amir (2016): ANNIS3: A new architecture for generic corpus query and visualization. in: Digital Scholarship in the Humanities 2016 (31). https://dsh.oxfordjournals.org/content/31/1/118 ↩
Installation
Since Annimate is a desktop-based application (as opposed to a website), you need to install it on your local system before you can use it.
The exact procedure depends on the operating system you are using. Annimate is currently available for Windows, Linux and macOS.
Windows
On Windows, Annimate comes with an installer that takes care of the installation process for you and can update your installation automatically whenever a new version of Annimate becomes available.
Note: Installing Annimate on Windows does not require administrator permissions. However, Annimate will only be installed for the current user, not system-wide.
In order to install Annimate, go through the following steps:
- Download the installer
.exefile from GitHub: Annimate_1.6.0_x64-setup.exe - Run the downloaded
.exefile and follow the instructions of the installation wizard - Afterwards, you can run Annimate through the Windows start menu entry and/or the link on your desktop, depending on the options you chose in the installation wizard
Automatic updates
Every time Annimate is started, it automatically checks for updates in the background. If there is an update, you are presented with a dialog telling you that an update is available and listing the most important changes. You can then choose to either
- apply the update, or
- skip the update for now.
If you choose to apply the update, the application will restart itself when the installation is completed. If you choose to skip the update, you will be reminded again the next time you start the application.
Note: We strongly recommend that you install updates in order to keep up with new features and bugfixes.
Linux
On Linux, Annimate comes in two different formats that you can choose from: an AppImage and a Debian package.
AppImage
The Annimate AppImage is a self-contained application bundle that includes all of its dependencies pre-bundled and runs on all common Linux distributions such as Ubuntu, Debian, openSUSE, RHEL, CentOS and Fedora without requiring a dedicated installation step. It can update itself automatically whenever a new version of Annimate becomes available.
In order to use the AppImage, go through the following steps:
- Download the
.AppImagefile from GitHub: Annimate_1.6.0_amd64.AppImage - Make it executable:
chmod a+x Annimate*.AppImage - Afterwards, you can run Annimate by running the
.AppImagefile:./Annimate*.AppImage
Automatic updates
Every time Annimate is started, it automatically checks for updates in the background. If there is an update, you are presented with a dialog telling you that an update is available and listing the most important changes. You can then choose to either
- apply the update, or
- skip the update for now.
If you choose to apply the update, the application will restart itself afterwards. If you choose to skip the update, you will be reminded again the next time you start the application.
Note: We strongly recommend that you install updates in order to keep up with new features and bugfixes.
Since there is no dedicated installation step, updating in this case just means that the .AppImage file is replaced with a newly downloaded one. Note that the name of the .AppImage file (which includes a version number) stays the same, even though it now contains a newer version. If you want to avoid this, consider renaming the file to give it a version-independent name.
Debian Package
On Debian and its derivatives (such as Ubuntu), you can alternatively install Annimate from a Debian package. Note that this requires sudo privileges and does not support automatic updates.
In order to install the Debian package, go through the following steps:
- Download the
.debfile from GitHub: Annimate_1.6.0_amd64.deb - Install it:
sudo dpkg -i ./Annimate_*_amd64.deb - Start Annimate:
Annimate
macOS
On macOS, Annimate comes as a macOS Application Bundle (.app file) packaged in a .tar.gz archive. It can update itself automatically whenever a new version of Annimate becomes available.
There are two different versions of the Application Bundle for different types of processors:
- Apple silicon processors (for newer Mac computers, starting from late 2020)
- Intel processors (for older Mac computers)
Check the Apple Support to find out which type of processor you have. Annimate requires a macOS version of 10.13 “High Sierra” or newer.
Note: As the Annimate Application Bundle is not signed by Apple, your system will set a “quarantine” attribute for the downloaded file. You will need to remove this attribute as described below. Otherwise you will see a message saying that “Annimate is damaged and can’t be opened” when trying to start it.
In order to install Annimate, go through the following steps:
-
Download the
.tar.gzfile from GitHub:- Annimate_aarch64.app.tar.gz for Apple silicon processors
- Annimate_x64.app.tar.gz for Intel processors
-
Double-click on the
.tar.gzfile in yourDownloadsfolder to extract it: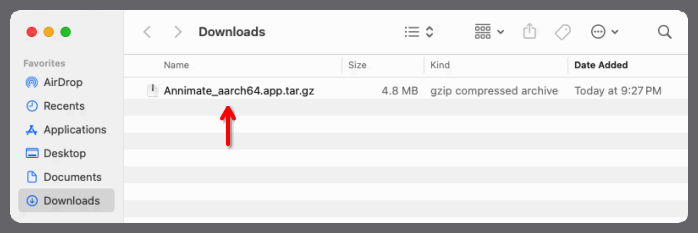
This will produce an
AnnimateApplication Bundle:
-
Move the
AnnimateApplication Bundle to one of the following folders:- To install it only for the current user (does not require administrator permissions): Move it to a subfolder of your home directory such as
~/Applications. You may have to create this folder first in case it does not exist yet. - To install it system-wide (requires administrator permissions): Move it to the system-wide
/Applicationsfolder.
- To install it only for the current user (does not require administrator permissions): Move it to a subfolder of your home directory such as
-
Open a terminal by clicking on the “Terminal” icon in your Dock:

-
In the terminal, go into the folder containing the
AnnimateApplication Bundle (Annimate.appfile) and run the following command to remove the quarantine attribute:xattr -d com.apple.quarantine Annimate.appThe following screenshot shows a terminal session where the file is moved from the
Downloadsfolder to the (newly created)~/Applicationsfolder and the quarantine attribute is removed: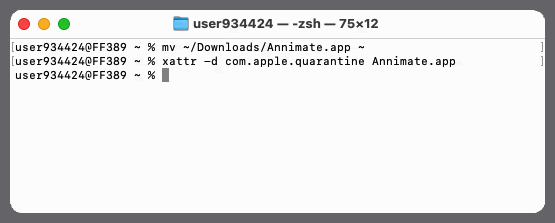
-
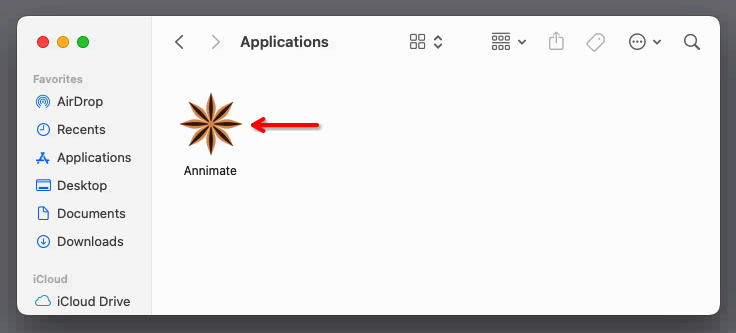
Afterwards you can run Annimate by navigating to the installation folder (here:
~/Applications) and double-clicking on theAnnimateapp icon: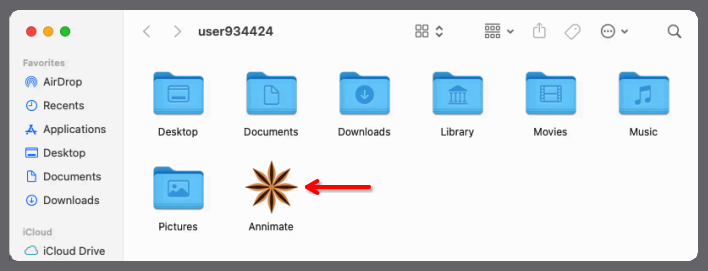
Automatic updates
Every time Annimate is started, it automatically checks for updates in the background. If there is an update, you are presented with a dialog telling you that an update is available and listing the most important changes. You can then choose to either
- apply the update, or
- skip the update for now.
If you choose to apply the update, the application will restart itself afterwards. If you choose to skip the update, you will be reminded again the next time you start the application.
Note: We strongly recommend that you install updates in order to keep up with new features and bugfixes.
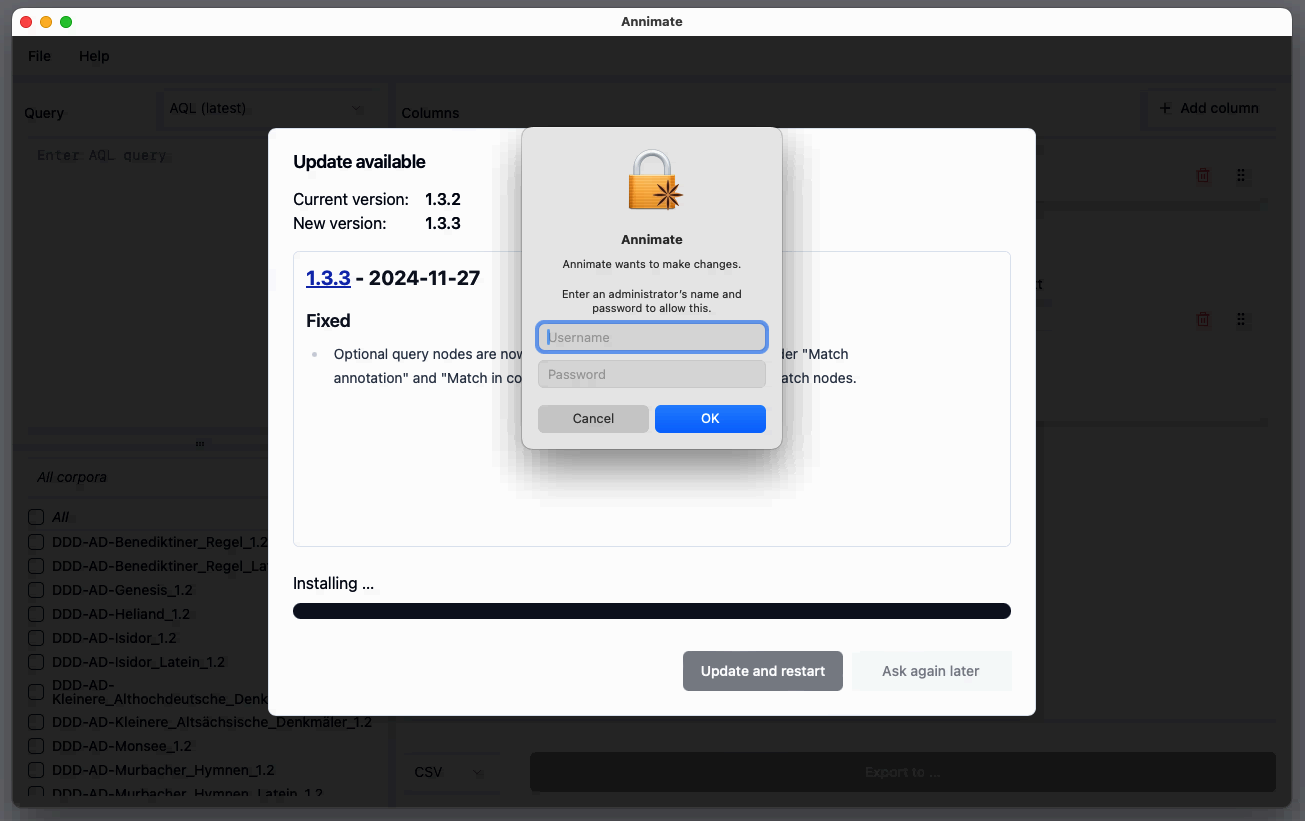
In case Annimate is installed in a folder that requires administrator permissions, you are prompted to enter your administrator credentials:
Obtaining Older Versions
For reference, you can find the most recent and all previous releases of Annimate on the Releases page on GitHub.
What’s Next?
After you have successfully installed Annimate, you can proceed with Importing Corpus Data.
Importing Corpus Data
Before you can run a query and export its results, you need to obtain corpus data for one or more corpora and import them into your installation of Annimate.
Note that there are different definitions of what constitutes a corpus, depending on the context. In this User Guide, we will use the Referenzkorpus Altdeutsch (ReA) 1.2 as an example. It consists of several parts:
ReA 1.2
├─ DDD-AD-Benediktiner_Regel_1.2
├─ DDD-AD-Benediktiner_Regel_Latein_1.2
├─ DDD-AD-Genesis_1.2
├─ DDD-AD-Heliand_1.2
├─ DDD-AD-Isidor_1.2
   ...
While one would commonly call the full ReA 1.2 a corpus, it’s each individual part such as DDD-AD-Benediktiner_Regel_1.2 that’s called a corpus in the context of ANNIS and Annimate. In order to keep all the corpora belonging e.g. to ReA 1.2 together as a group, Annimate supports organizing corpora in corpus sets as described below.
Note: In this User Guide, we mostly follow this convention of referring to each individual part as a corpus. However, we sometimes use the same term for a corpus in the conventional sense (e.g. ReA) where it’s convenient and unlikely to cause confusion.
Obtaining Corpus Data
Corpora are distributed in many different data formats, two of which are related to ANNIS and are supported by Annimate:
- graphANNIS/GraphML: This is the graph-based format used internally by ANNIS. In this format, each corpus comes as a single
.graphmlfile. - relANNIS: This is the relational format that was previously used by ANNIS but is still used to distribute many corpora. In this format, each corpus comes as a folder containing multiple files with fixed names such as
corpus.tabornode.tab.
Annimate can import corpora in both of these formats. It can also import (potentially nested) folders or ZIP files containing one or more corpora in either of these formats.
There are several ways to obtain corpus data:
- Download the data from a public repository such as LAUDATIO: In the “Download” menu for each corpus (here in the sense of a corpus set such as ReA), you find a list of the formats in which the data are available. Select
graphannisorrelannisif available. The downloaded ZIP file can be imported directly into Annimate. - If the corpus is available in a linguistic format different from graphANNIS or relANNIS, you may be able to convert it into one of the two supported formats using a conversion tool such as Annatto or Pepper:
- For Annatto, use the
graphmlexporter to convert the corpus into the graphANNIS/GraphML format. - For Pepper, select the
ANNISExporterin the export step to convert the corpus into the relANNIS format.
- For Annatto, use the
- If the corpus is accessible through a public installation of ANNIS, ask the maintainers of the installation to provide the data.
Note: See the Links section for download links for some publicly available corpora.
Importing Into Annimate
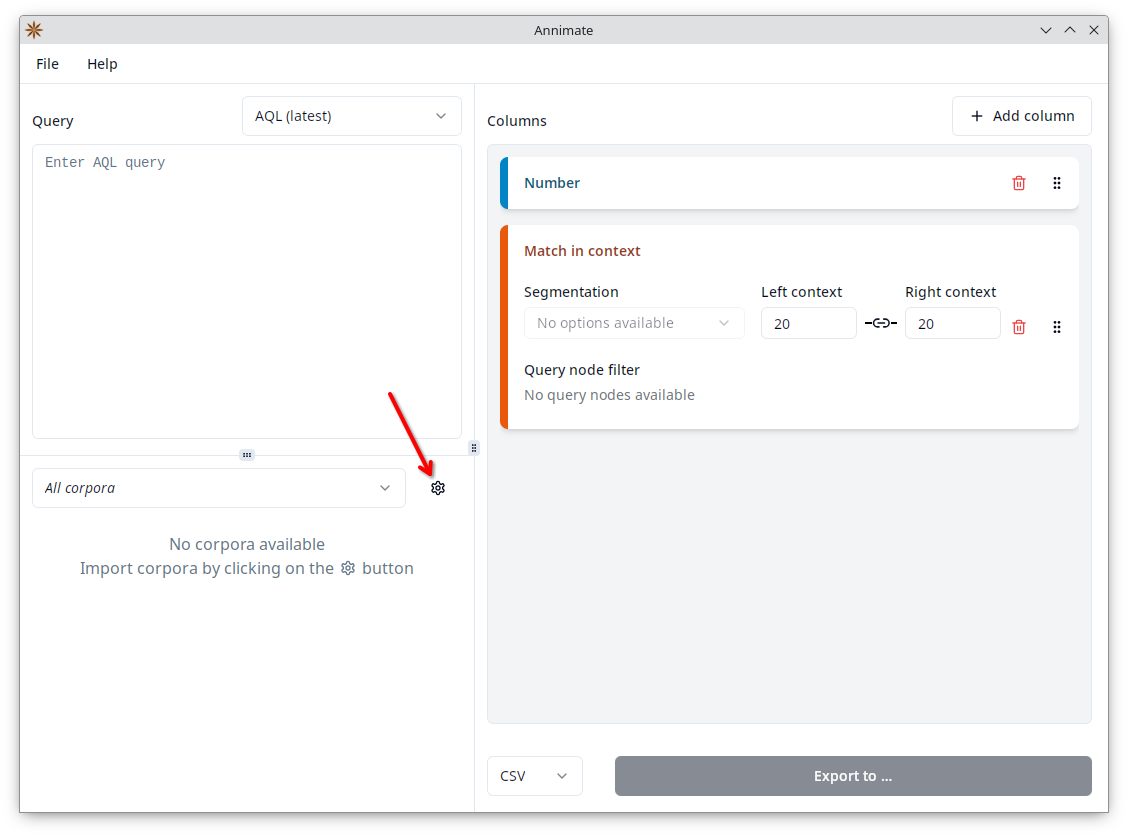
- In Annimate, click on the
button to reach the “Manage corpora” screen.
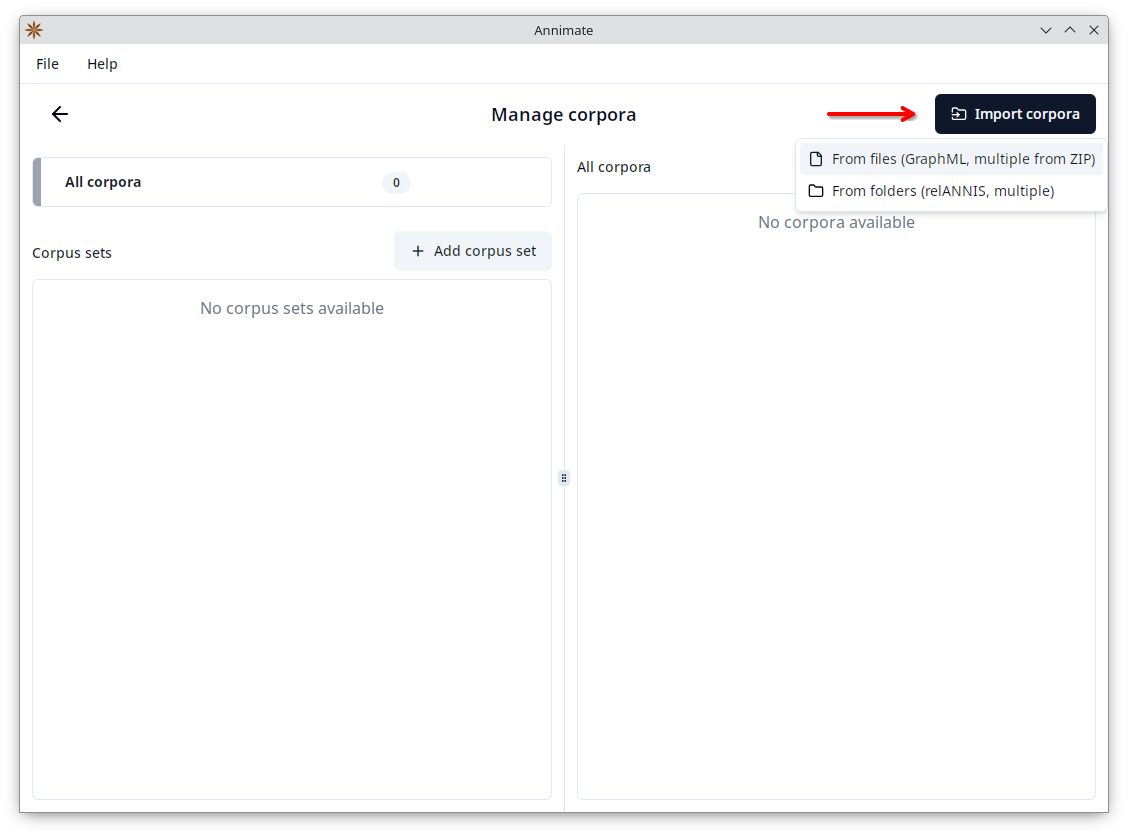
- Click on “Import corpora”, then select whether you want to import one or more files (for GraphML or ZIP files) or one or more folders (for relANNIS corpora or to import multiple corpora from one or more folders).
- Select one or more files/folders to import.
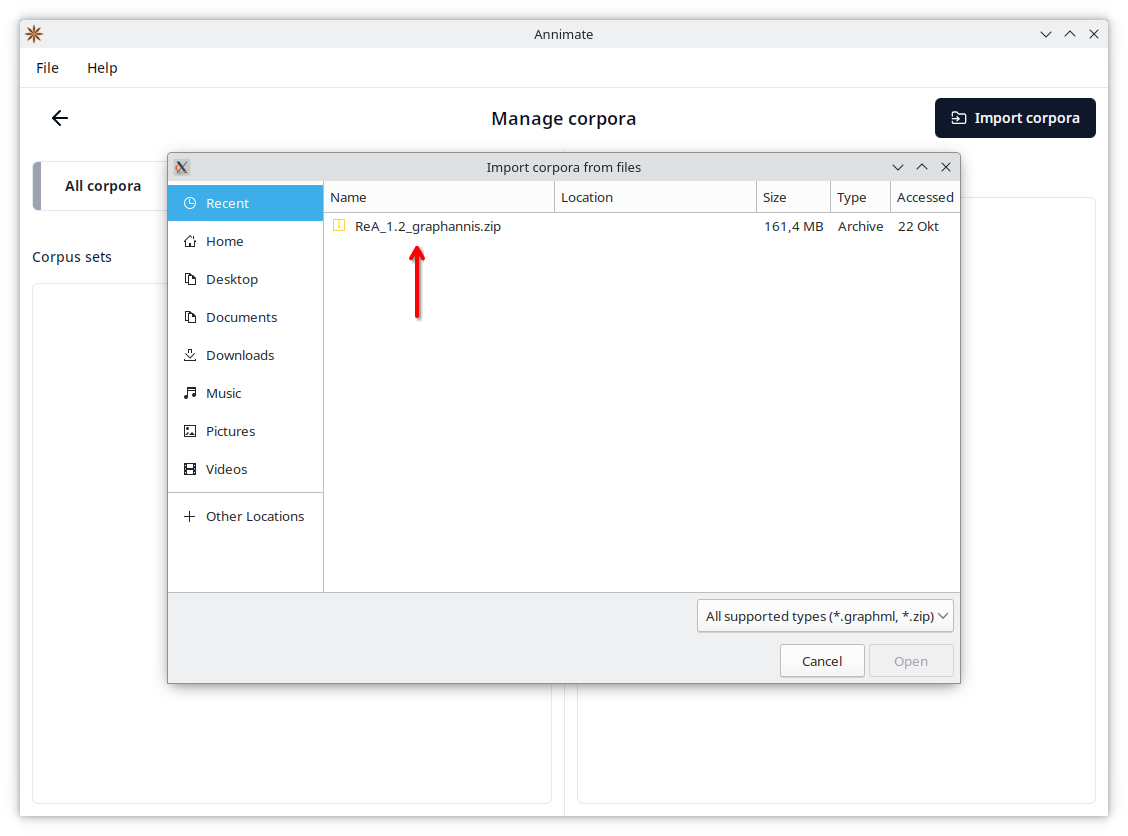
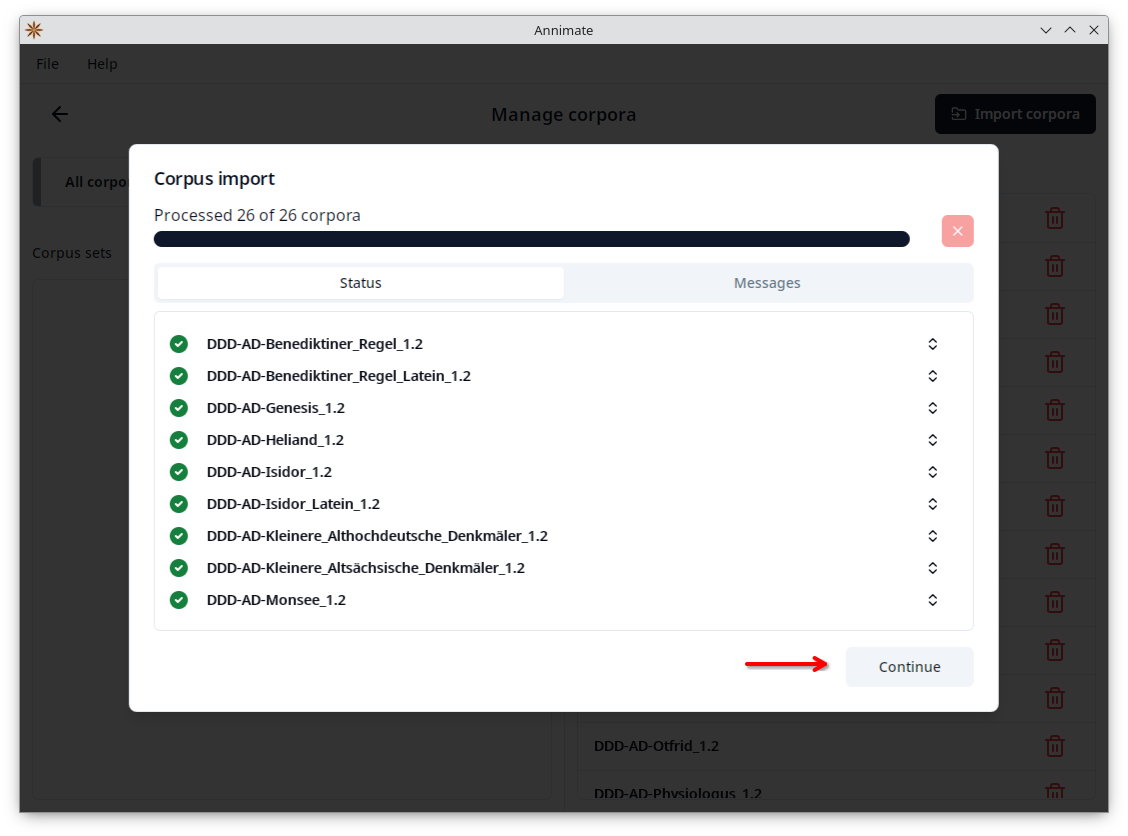
- Wait until the import is finished, then click on “Continue”.
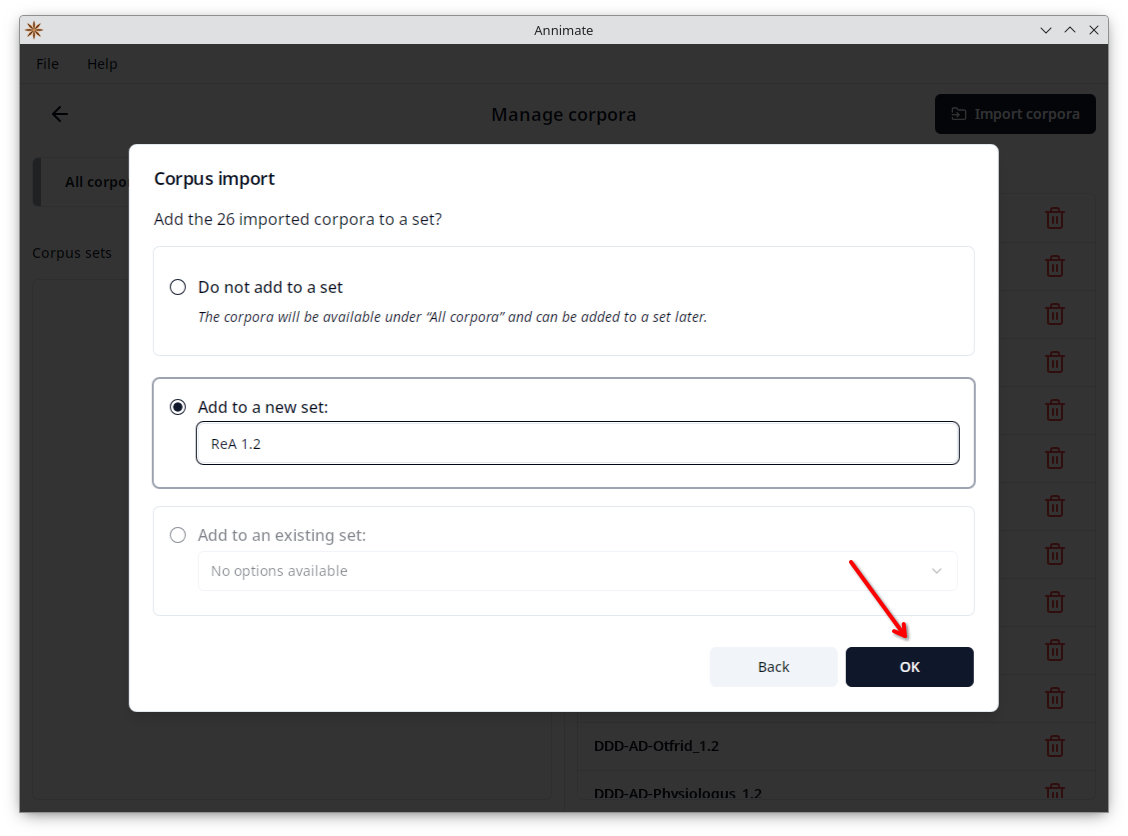
- In the final step you can optionally add all imported corpora to a (new or existing) corpus set. Click on “OK” to finish the import.
Note: It is not possible to keep two corpora of the same name imported at the same time. If you try to import a corpus with the same name as a corpus that was previously imported, the import will fail. This is true even if the old and new corpora are added to different sets.
A common case where this can happen is when there are multiple versions of a corpus, and the version numbers are not included in the corpus names. In this case, when an older version has already been imported, you cannot just import the newer version, because it has the same name. Instead, you first need to delete the older version (see below) before you can import the newer version.
Organizing Corpora and Corpus Sets
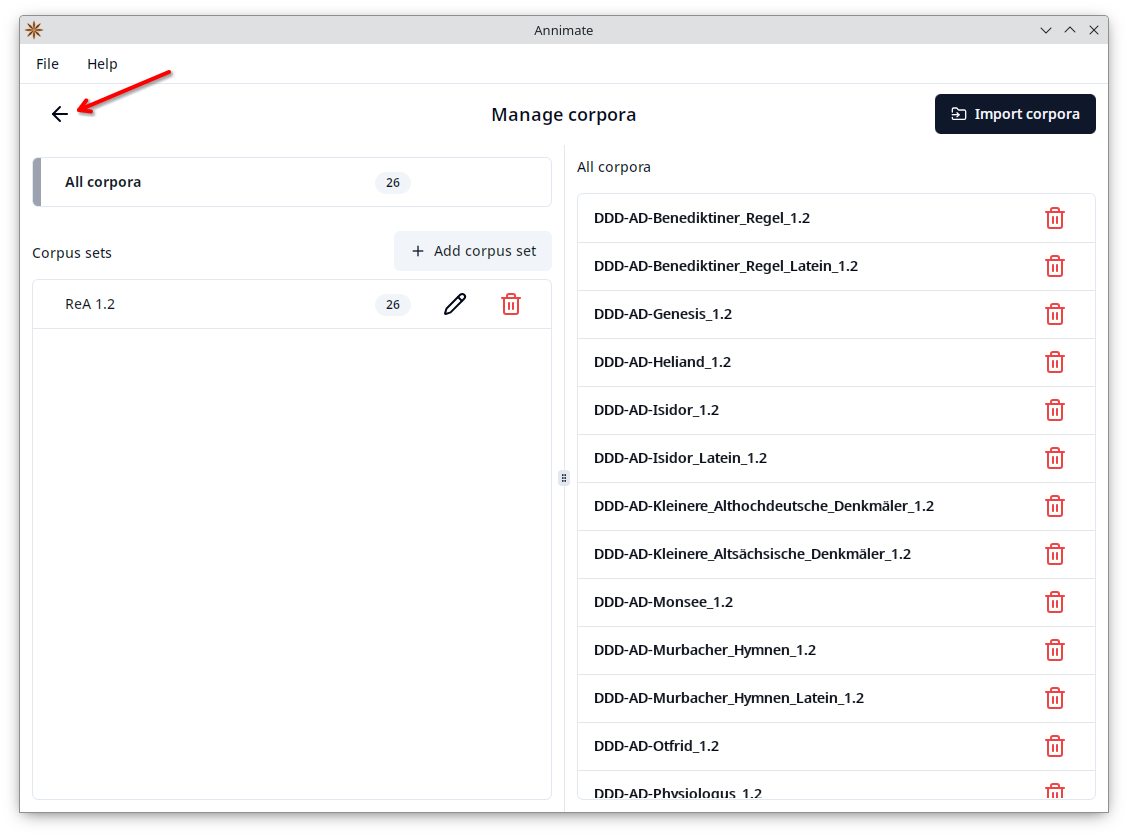
While you can add corpora to sets directly when they are imported, it is also possible to organize corpus sets at any time on the “Manage corpora” screen.
On the left-hand side, you can either select “All corpora” or a specific corpus set:
- When “All corpora” is selected, the right-hand side shows a list of all corpora. Here you can delete an individual corpus by clicking on the corresponding
button and then clicking on “Delete” in the following dialog. The corpus will be deleted and removed from all sets.
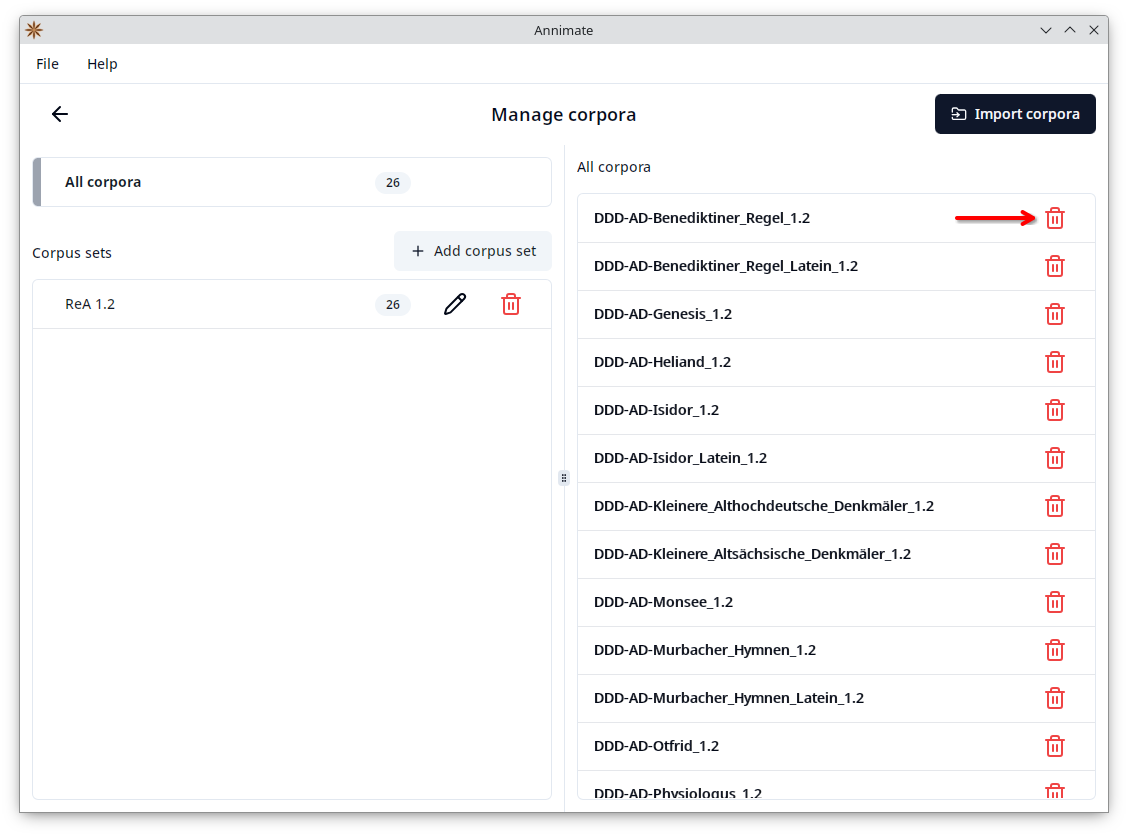
- When a specific corpus set is selected, the right-hand side shows a list of all corpora with checkboxes, where the corpora belonging to the selected set are checked. Check or uncheck a corpus in order to add or remove it from the selected set, respectively.
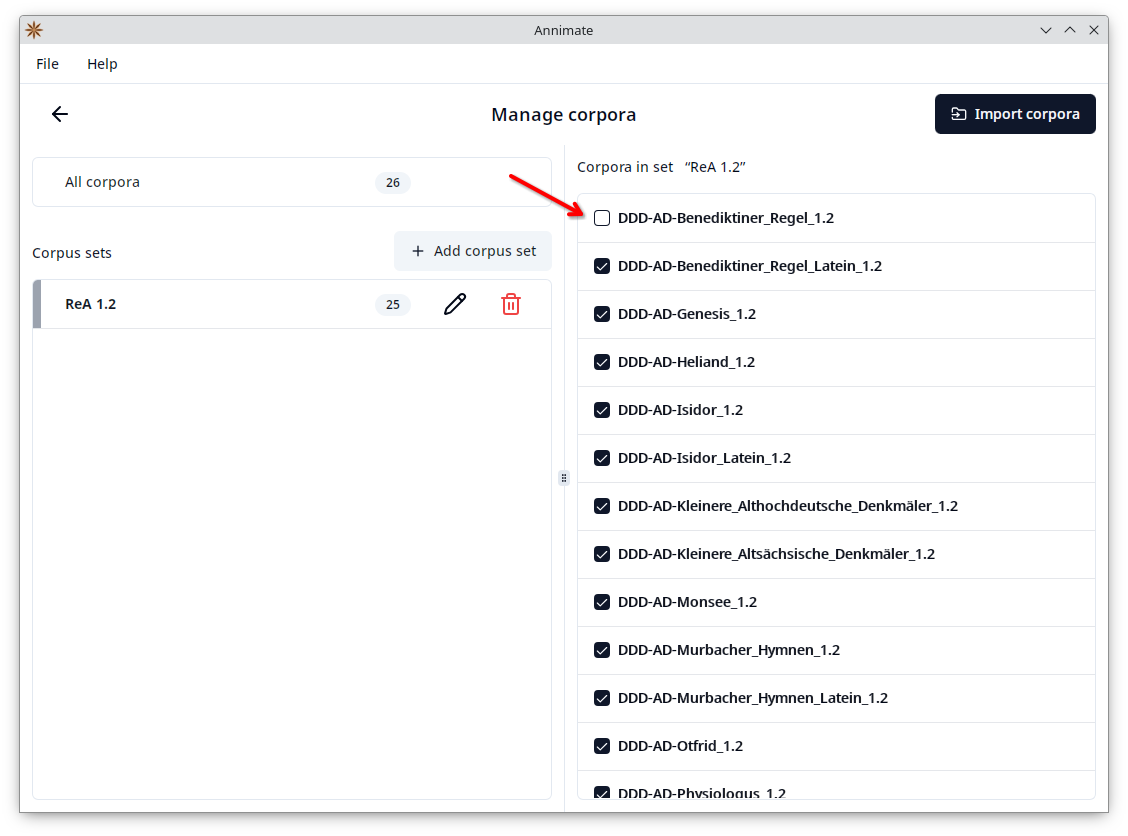
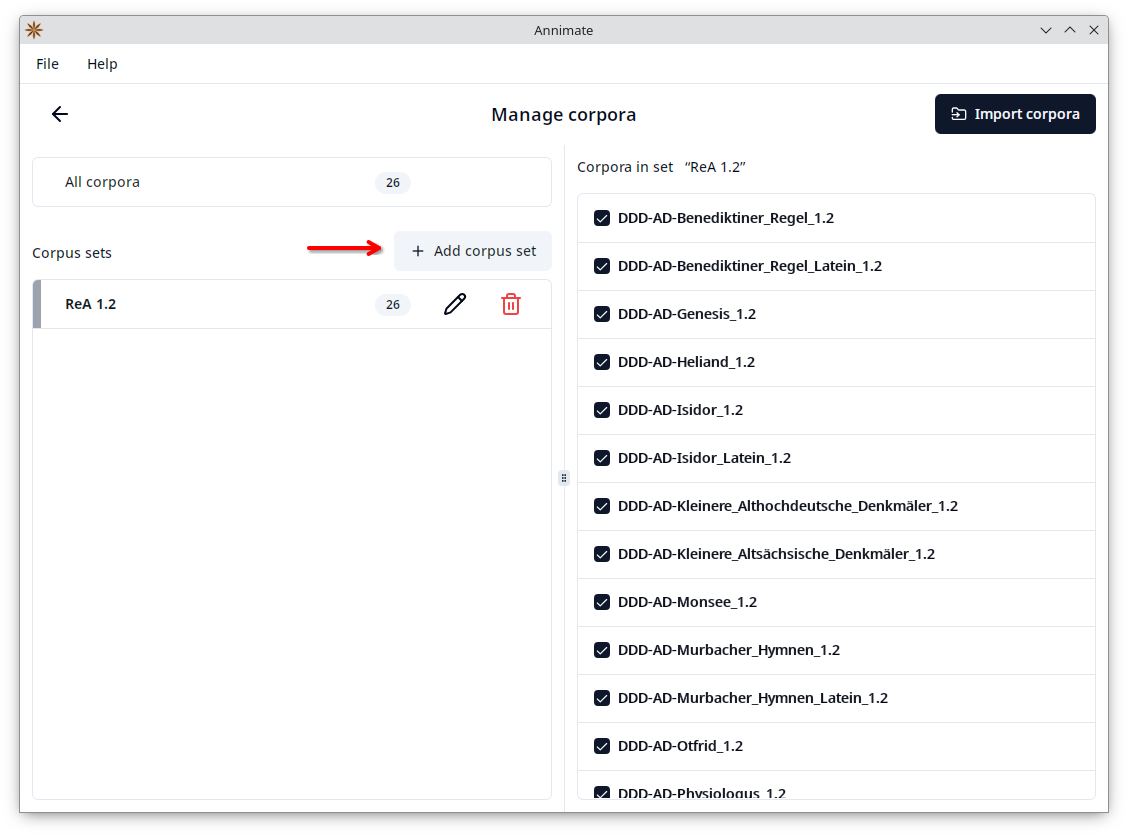
In order to create a new corpus set, click on the “Add corpus set” button, enter a name, and click on “OK”:
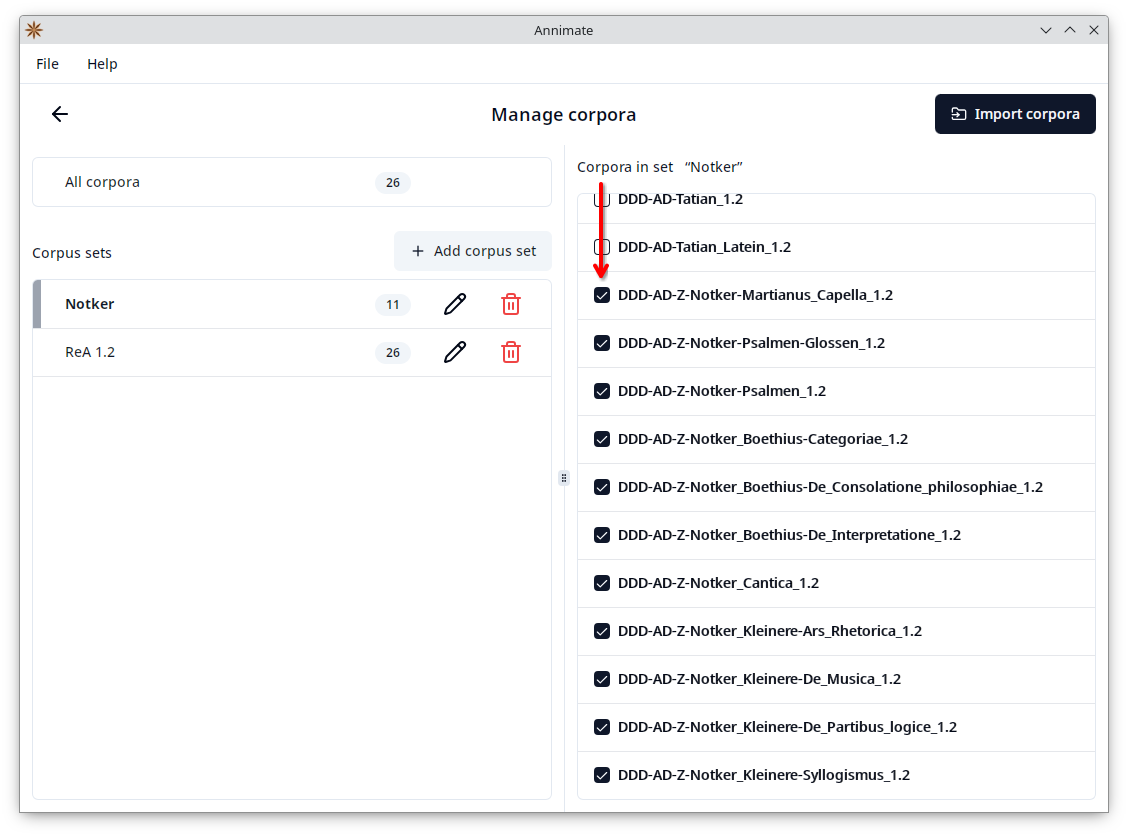
 Then check all corpora that you want to add to the set:
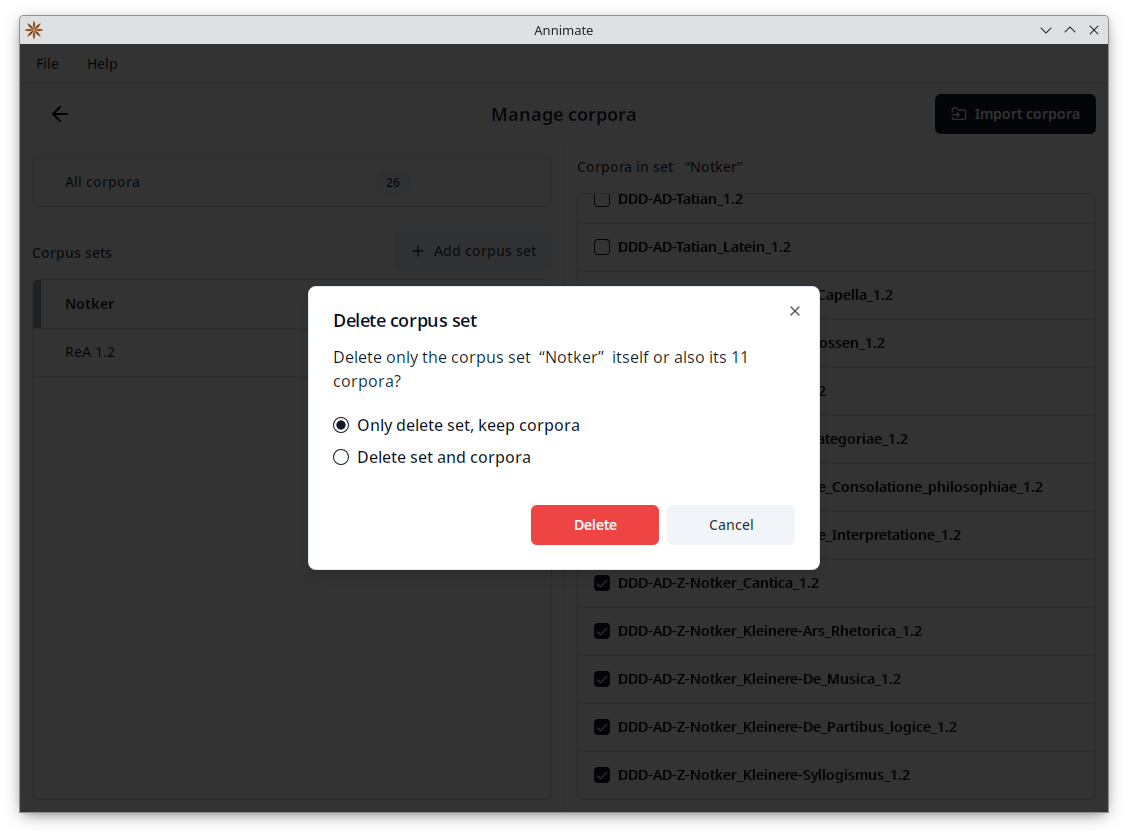
You can also rename a set by clicking on the corresponding button or delete it by clicking on the corresponding
button. When deleting a set, you can choose whether to only delete the set itself (keeping the corpora available under “All corpora” and in other sets they may be a part of), or to also delete all corpora of the set:
Click on the button to go back to the Annimate main screen.
What’s Next?
After you have successfully imported your corpus data, you can proceed with Exporting Query Results.
Exporting Query Results
Selecting Corpora
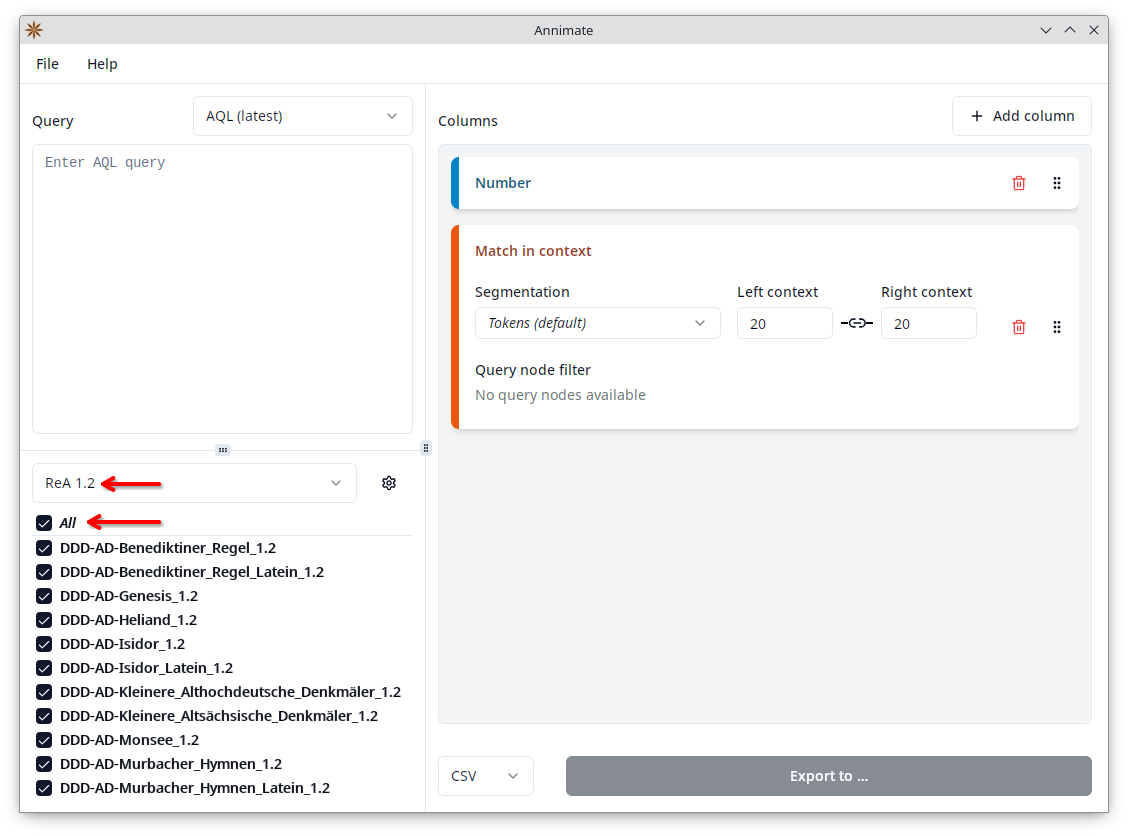
When you want to export query results, the first step is to select which corpora to query. On the lower left of the Annimate main screen, you see a list of all corpora that you have previously imported, and you can click on the checkbox next to each corpus in order to include it in the query. As a shortcut, you can click on the checkbox next to “All” to select all corpora in the list.
You can also select a corpus set in order to show only the corpora that are part of the set. The most common workflow is to first select a corpus set and then click on the checkbox next to “All” to select all corpora of the selected set.
Entering the Query
The next step is to enter a query in the ANNIS Query Language (AQL) on the upper left. See the corresponding section in the ANNIS User Guide for details on AQL.
Note: If there is an ANNIS installation available for your corpora, you may want to draft your query there, using ANNIS to visualize the results, and then copy-paste it into Annimate for the export. You can, of course, also type your query directly into Annimate.
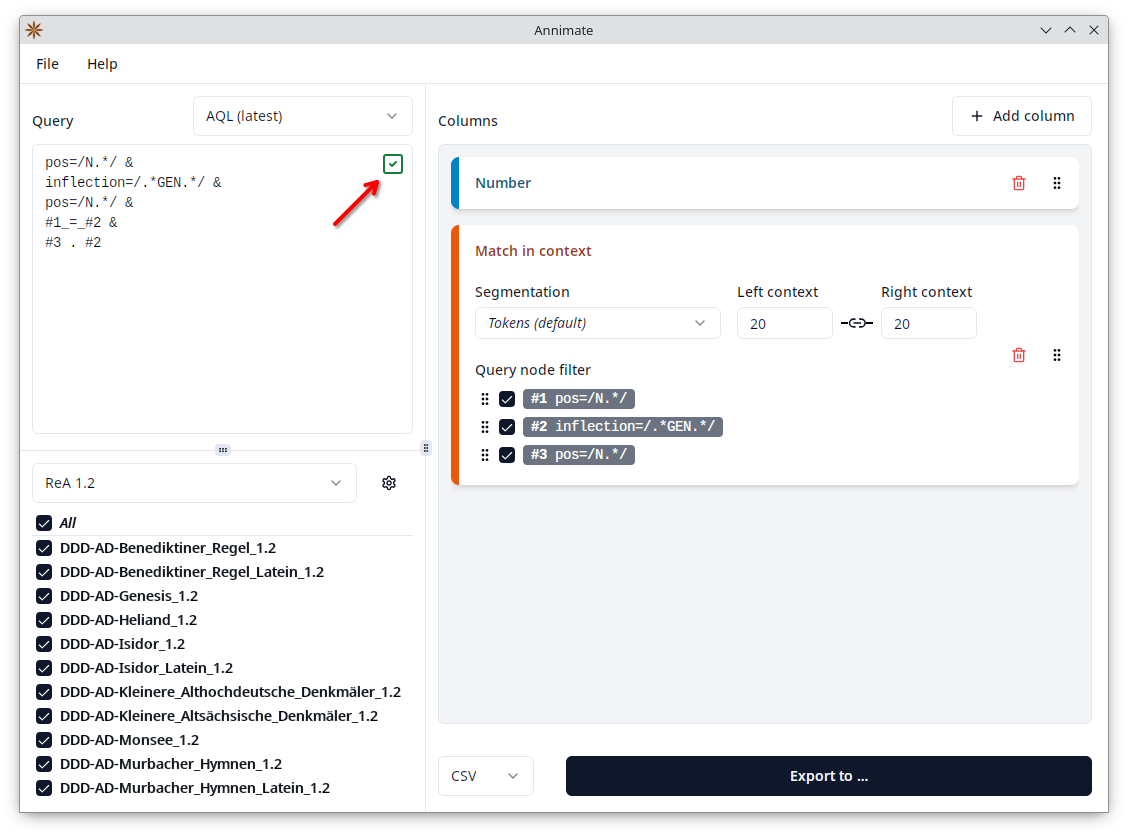
If the query is valid, you see a green checkmark in the corner of the query area:
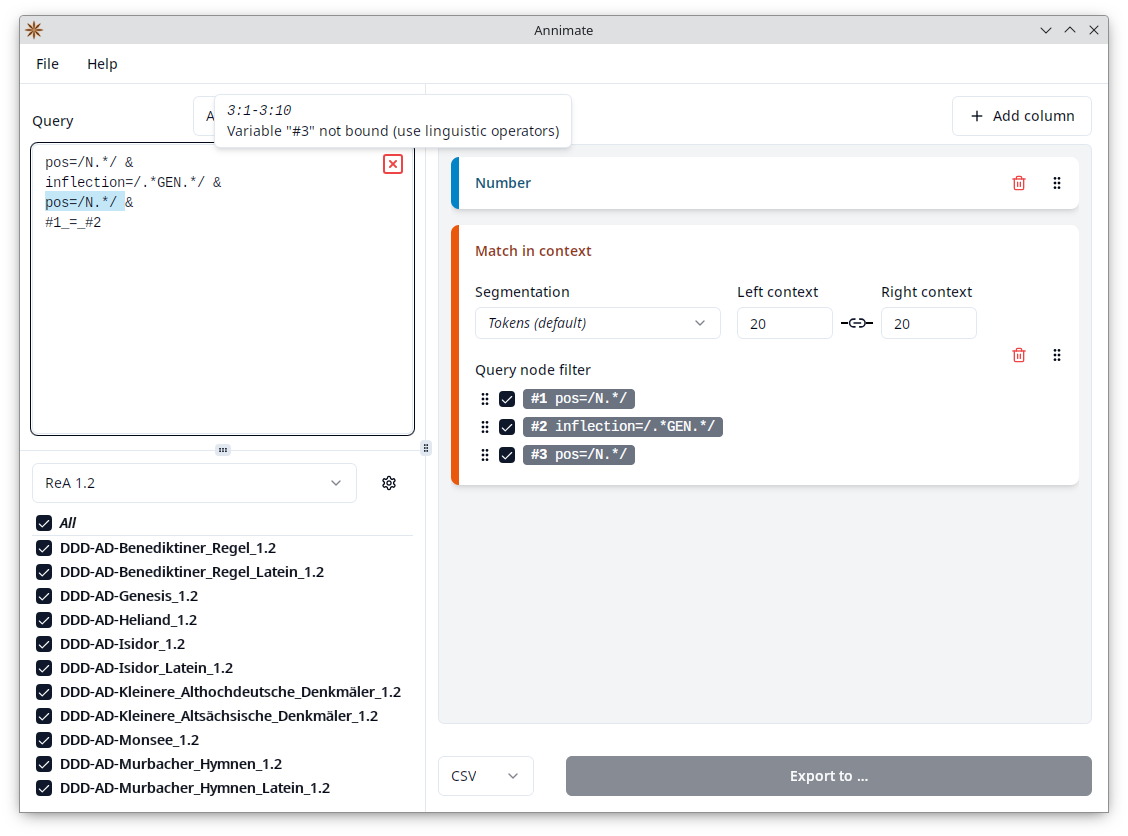
If the query is invalid, you see a red “x” icon. Hover over the icon with your mouse to see the error message. You can also click on the icon to make Annimate select the part of the query that the error message refers to:
Note that directly above the query area, you can select between two different versions of the ANNIS Query Language:
- AQL (latest): the current version of AQL used in ANNIS starting from version 4
- AQL (compatibility mode): the previous version of AQL used in ANNIS before version 4
The distinction between these two versions needs to be made because the same query may yield different results depending on which version you select, and a query may be valid in one version, but invalid in the other. For a detailed list of differences between the two, see Differences in Compatibility Mode in the ANNIS User Guide.
In general, you should always select “AQL (latest)” unless you need compatibility with an installation of e.g. ANNIS 3. The most common case where a query is valid in compatibility mode, but invalid in the latest version, is when it uses a meta:: condition, e.g. to restrict matches to a specific document:
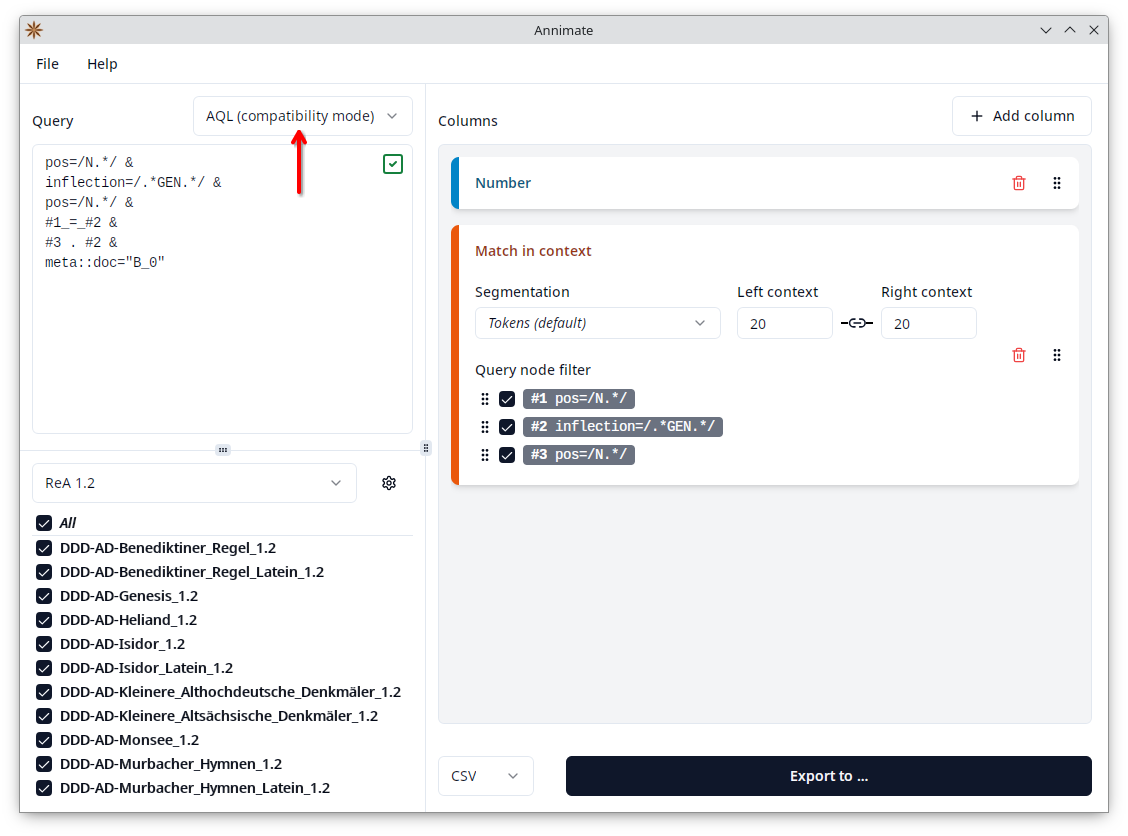
While it is possible to select “AQL (compatibility mode)” to support such queries, it is recommended to select “AQL (latest)” and replace the meta:: condition with the “part of” operator @*:
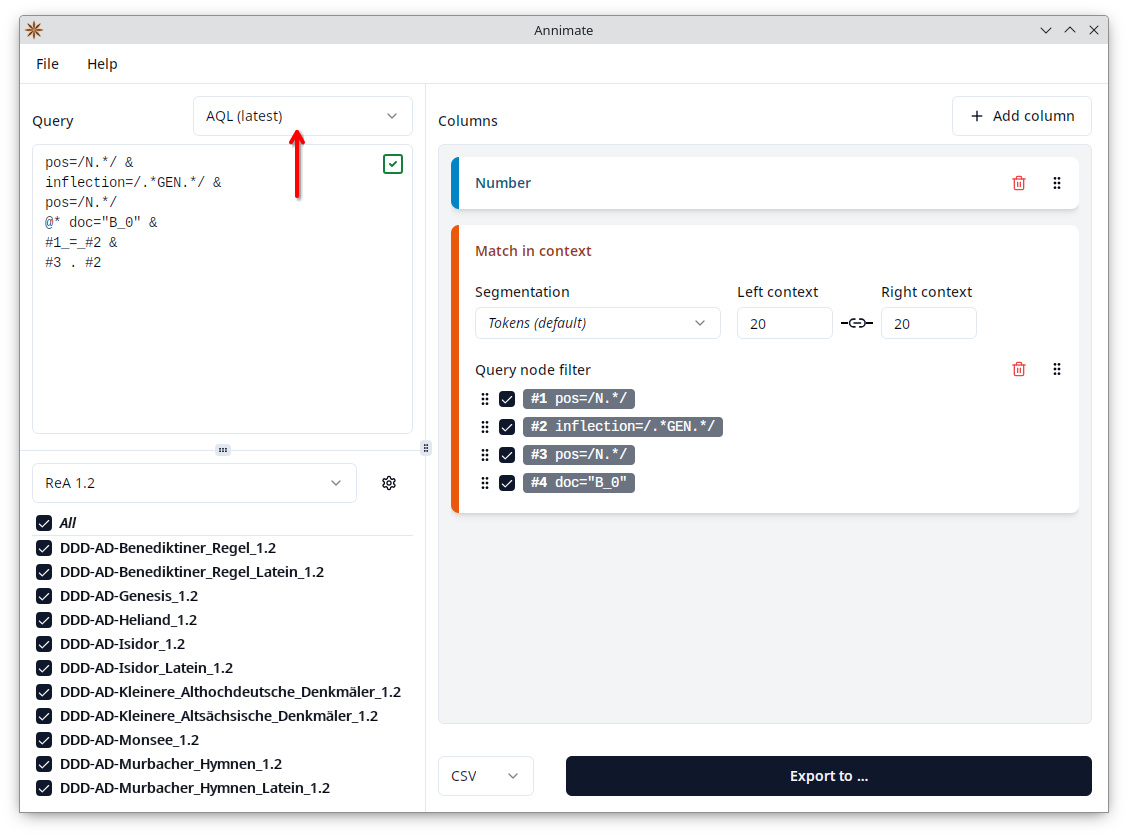
Configuring Table Columns
Since the query results will be exported as a table (either in CSV or Excel format), the next step is to define what columns the table should contain. This depends on what type of data about the matches you are interested in.
The right-hand side of the Annimate main screen shows a list of all columns that are currently configured.
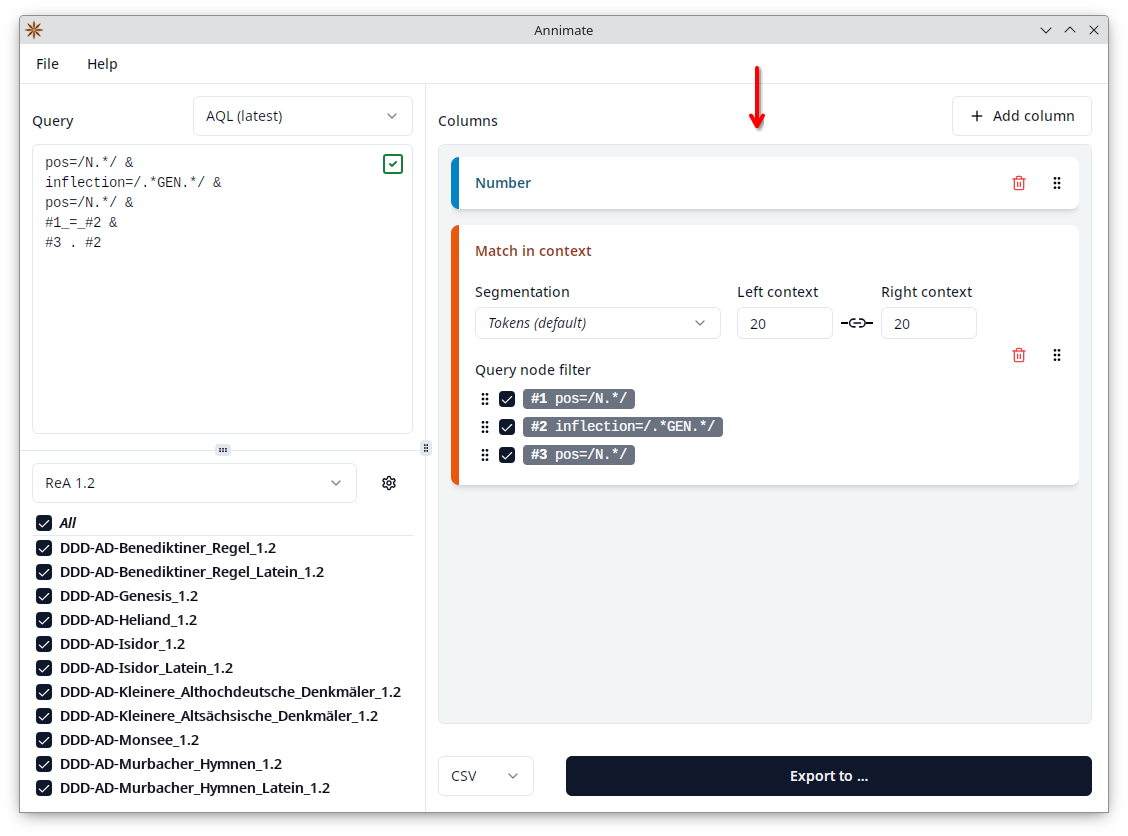
By default, there are two entries, one of type “Number” and one of type “Match in context”. You can manipulate this list in the following ways:
- Click on the
button of an entry to remove it.
- Click on the
button of an entry and then drag it up or down to reorder the entries.
- Click on the “Add column” button and select a column type to add a new entry:
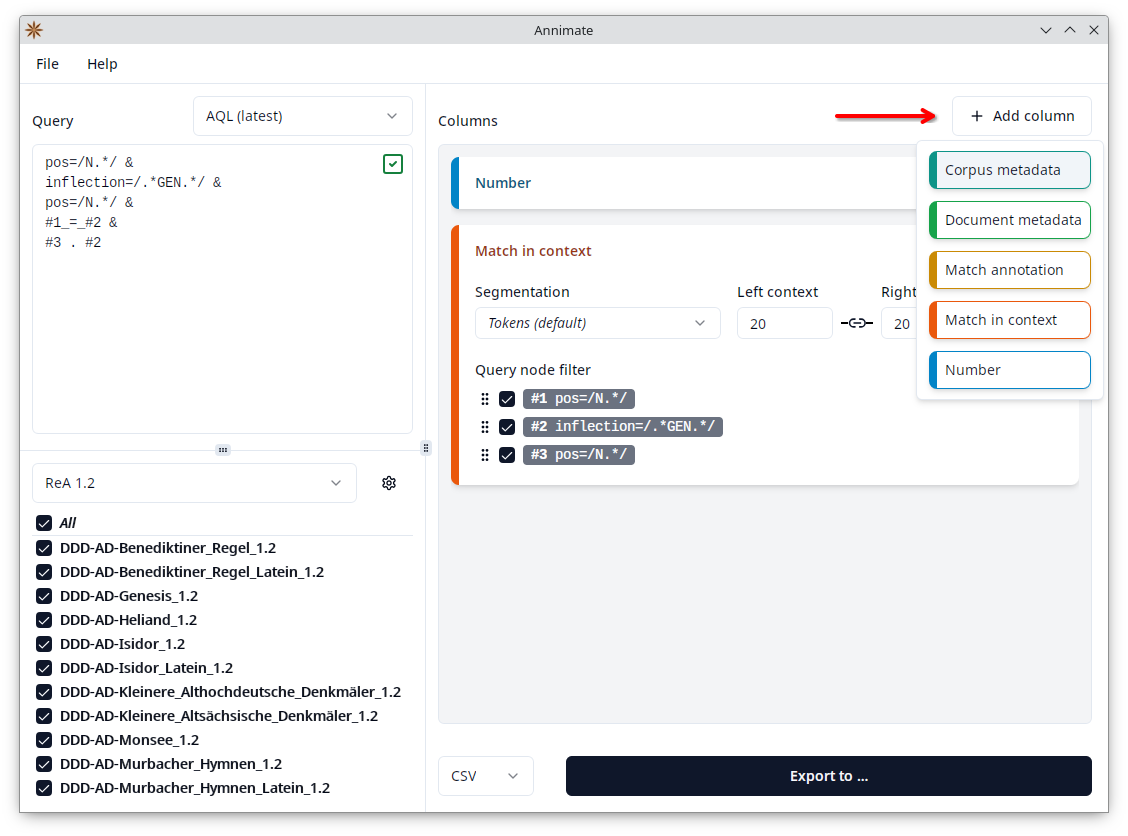
The following column types are available. For details on each column type, refer to the corresponding section.
Note: While each entry of the list will usually produce exactly one column, an entry of type “Match in context” will actually produce multiple columns. See Match in context for details.
Selecting the Format and Starting the Export
On the lower right of the Annimate main screen, you can choose between one of two formats for the export:
- CSV: This produces a
.csvfile containing a table in the Comma-Separated Values format. This format is not specific to any particular software and can be imported into all spreadsheet tools (including Microsoft Excel) or even opened with a text editor. - Excel: This produces a
.xlsxfile containing an Excel workbook. Since it doesn’t make use of advanced features of Microsoft Excel, it can also be opened with most other spreadsheet tools such as LibreOffice Calc.
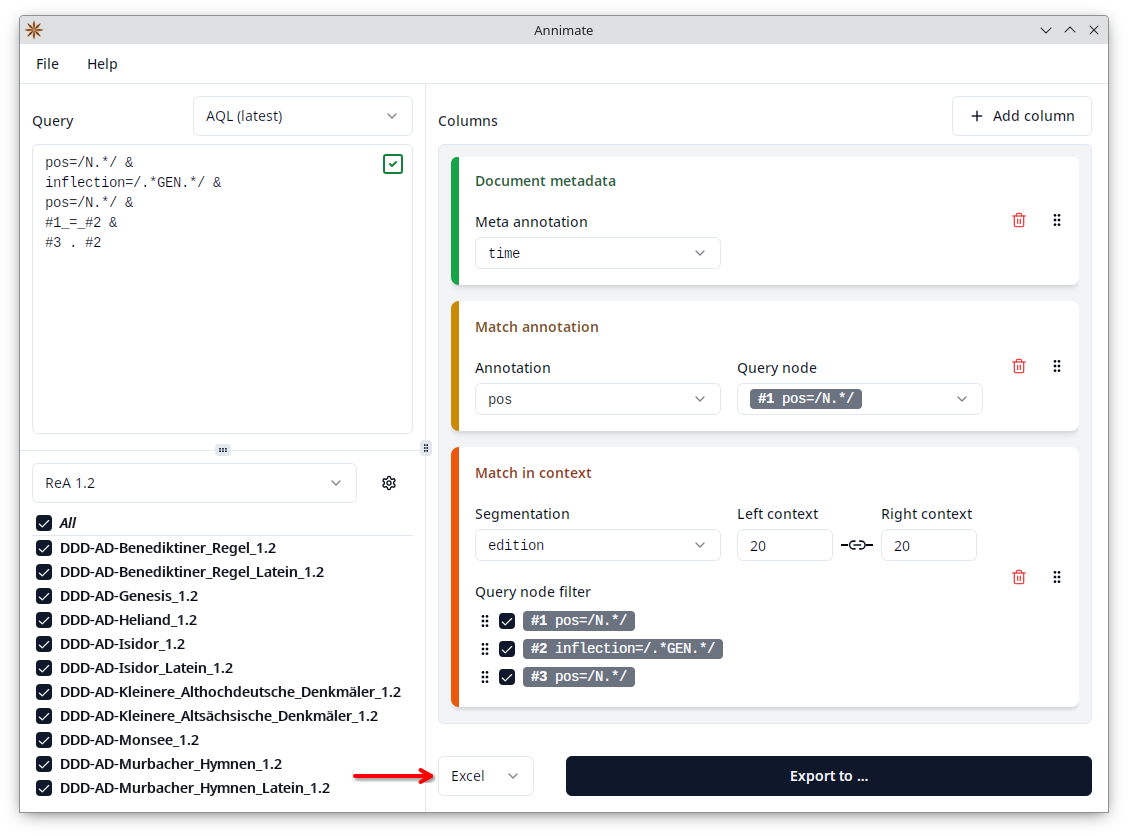
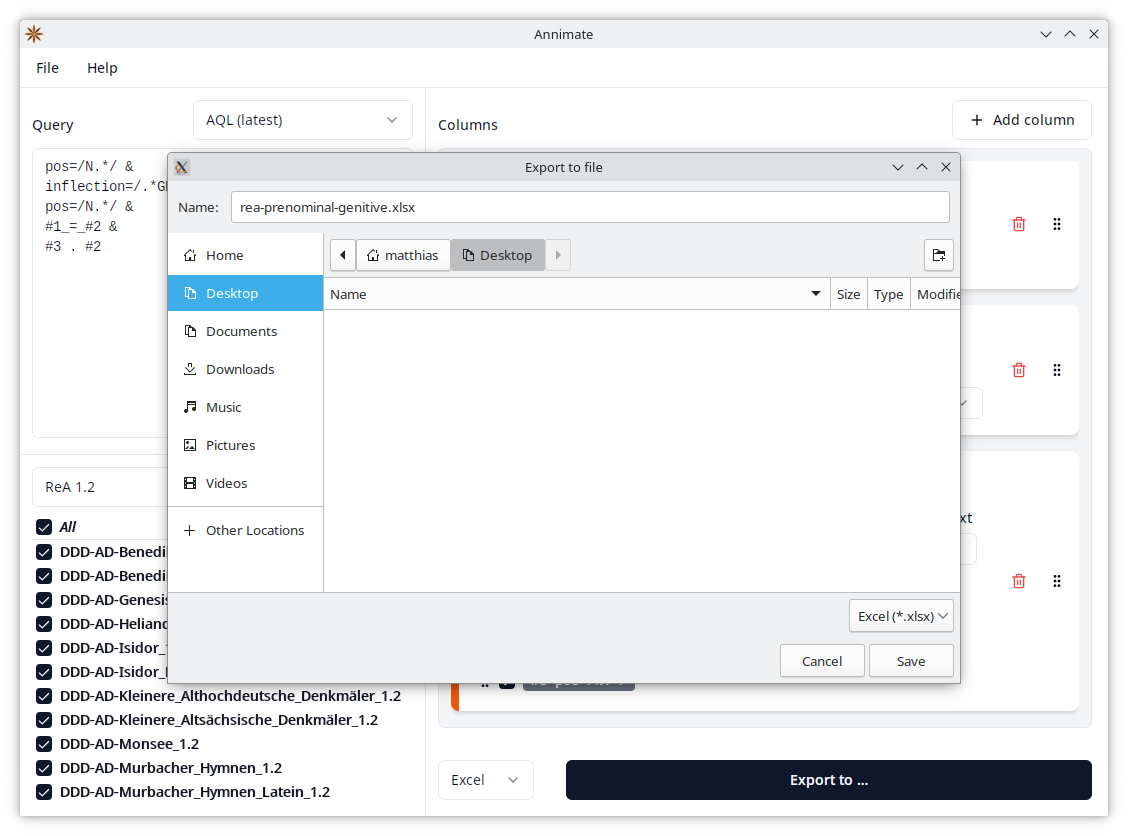
Finally, click on the “Export to …” button and select a filename in order to start the export. In case the information needed to start the export is still incomplete, the button is disabled (grayed out) and you see a blue information icon next to it. Hover over the icon with your mouse to see what’s missing:
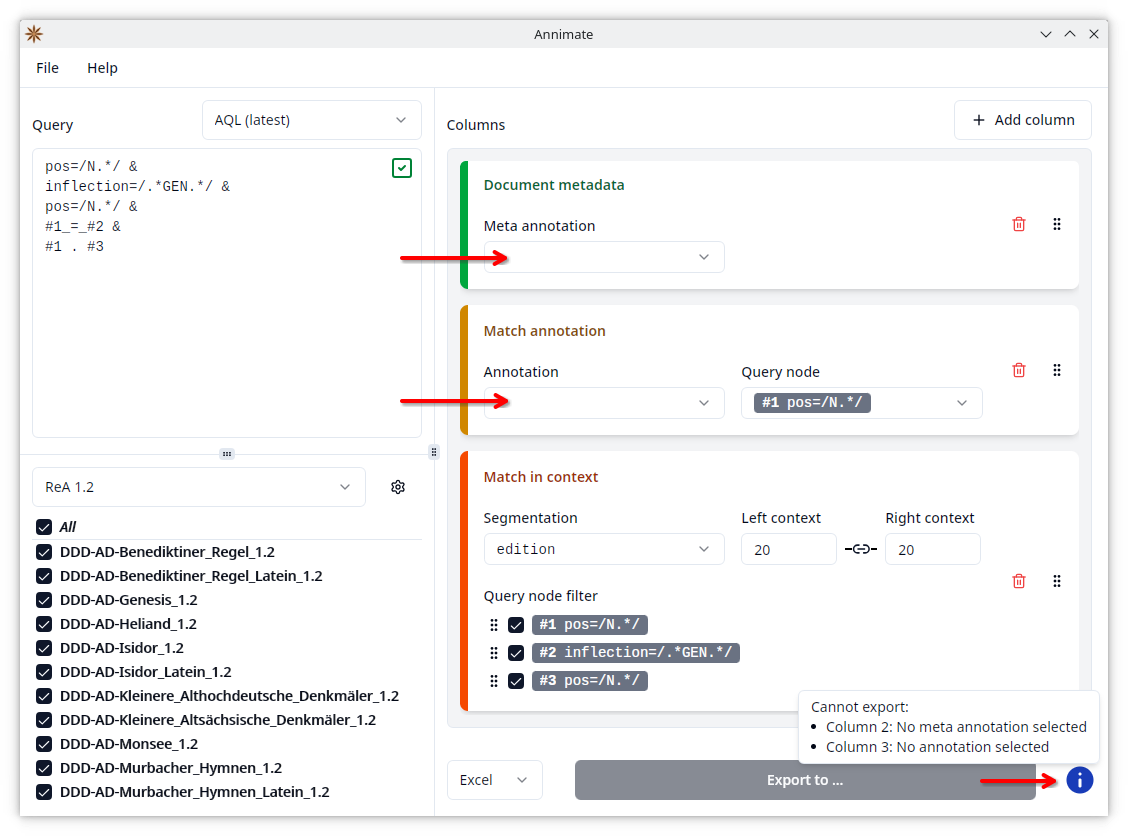
In general, make sure that the following conditions are satisfied:
- At least one corpus is selected.
- A query has been entered and is valid (showing a green checkmark).
- At least one column has been configured.
- All configured columns have all their fields set to a value (Segmentation, Left/right context, Annotation, Query node, Meta annotation)
Note: If you change the selection of corpora and/or the query after you have already configured the columns, it can happen that a previously selected option is no longer available (e.g. for “Query node” if you change the query so that the selected node no longer exists). Then the selection is cleared and the “Export to …” button becomes disabled. In this case, go through the list of columns again and make sure that all fields are filled.
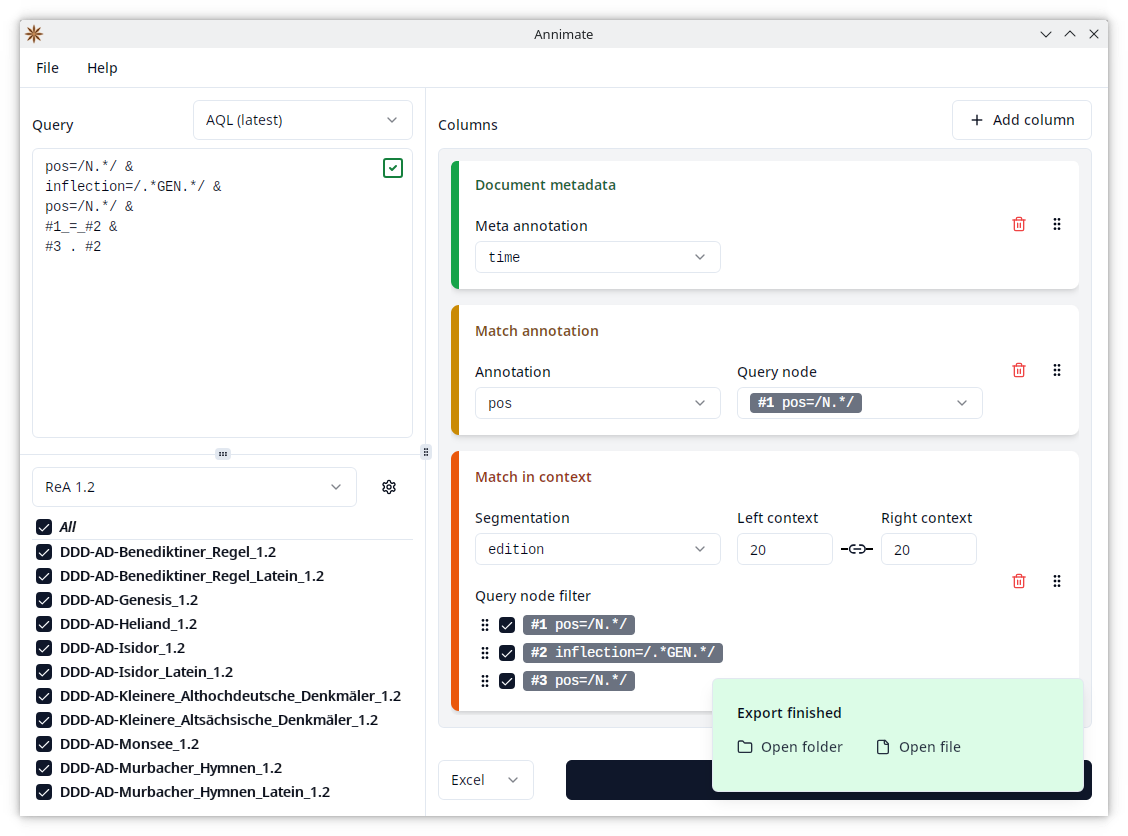
When the export is finished, you will see a notification with shortcuts to open the folder containing the file in your system’s File Explorer or to open the file directly in the program associated with .csv respectively .xlsx files on your system.
Working With Exported Data
CSV Files
The .csv files produced by Annimate are human-readable and can be opened with any text editor. In case you want to import them into a spreadsheet tool, make sure to use the following configuration for the tool (naming may vary depending on the tool):
- Delimiter: Comma
- Includes header row: Yes
In order to import a CSV file into Microsoft Excel, follow the steps in the Excel documentation. We recommend the approach documented under “Import a text file by connecting to it” (not “Import a text file by opening it in Excel”) since it gives you more control over how Excel interprets the data.
Excel Files
The .xlsx files produced by Annimate can be opened directly in Microsoft Excel or any other spreadsheet tool that supports the Excel file format. It contains two separate worksheets:
- Data: This contains the actual exported data. Note that it includes a header row, so the row number displayed by Excel is offset by one compared to the number of the match. In order to include the number of the match, add a “Number” column.
- Information: This contains some information about the export that helps you document and reproduce it:
- The query
- The query language: “AQL latest” or “AQL (compatibility mode)” as described above
- The list of corpora
- Which version of Annimate was used to produce the export
What’s Next?
In order to save and resume your work or collaborate with others, learn about Working With Projects.
Number

This produces a single column that just contains the number of each match, i.e. it contains 1 for the first match, 2 for the second match and so on.
This can be useful for referring to specific matches when analyzing the exported data. When exporting to Excel, it is particularly useful because Excel’s automatic row numbering counts the header row as row number 1 and the first match row as row number 2, while a “Number” column produced by Annimate starts with 1 for the first match. The number next to the last match is the total number of matches.
Match in context
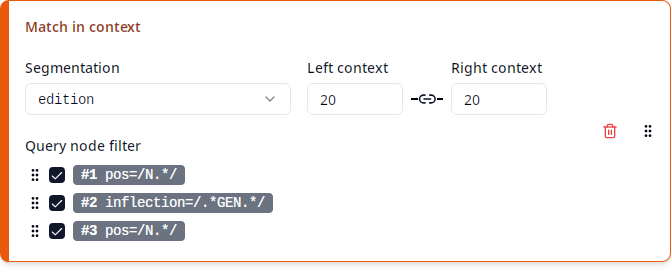
This produces multiple columns showing each match within its context in the corpus, in a format which is known as Key Word in Context or KWIC. Each match may consist of multiple nodes, which correspond to the nodes of the query referenced by the variables #1, #2, etc. For instance, the query
pos=/N.*/ &
inflection=/.*GEN.*/ &
pos=/N.*/ &
#1_=_#2 &
#1 . #3
consists of three nodes referenced by the variables #1, #2 and #3, so each match also consists of three nodes. As queries can be “or” queries with multiple alternatives, the number of nodes may vary from one match to another. The exact number of columns in the export depends on the maximal number of nodes contained in any match. In the simplest case, if the query contains only a single node (referred to as #1), every match also contains a single node and the export will contain three columns:
| Left context | Match | Right context |
|---|
If the query contains two nodes (referred to as #1 and #2), the export will contain five columns:
| Context 1 | Match 1 | Context 2 | Match 2 | Context 3 |
|---|
And so on. Note that optional nodes are not included in the export.
A corpus may define several different segmentation layers (or segmentations for short), which define how the text is split up into nodes. The most fine-grained segmentation layer is called the token layer. This layer is always present and each node on any segmentation layer spans one or more of these tokens. For instance, the ReA corpus contains the edition and text layers besides the token layer.
Under “Segmentation”, you can select the segmentation layer to be used for the “Match in context” columns. This list only contains segmentations that exist in all of the selected corpora. Since one typically runs a query over a set of corpora with a similar annotation structure (for instance all corpora of ReA), the list should be as expected. If you’re missing a segmentation, check if any of your selected corpora may be structured differently from the others, e.g. by checking if the desired segmentation appears when just a single corpus is selected.
Note: In corpora with multiple segmentation layers, the token layer is often only used to align the different segmentations (i.e. define which segmentation nodes on the different layers span the same parts of the text), but doesn’t have any textual content itself. In the case of these virtual tokens, you need to select a segmentation different from Tokens (default) or else the “Match in context” columns will be empty.
Under “Left context” and “Right context” you can define how many segmentation nodes to the left respectively right of any match node should be included as context. You can enter any number from 0 to 999 inclusive. Since it is very common to use the same size for the left and right contexts, by default changing one of the two numbers will automatically set the other to the same value. In order to turn off this behavior, enabling you to set the left and right context sizes independently, click on the “link” icon between the two.
Note: Some corpora contain non-standard segmentations where the context size cannot be measured in segmentation nodes for technical reasons. In such cases, context size will be measured in tokens instead. This can lead to smaller context windows than expected. In this case, just increase the context size as needed. The textual content of the “Match in context” columns will still be according to the selected segmentation in any case.
Note that setting very small context sizes can lead to “gaps” in the export in case a match consists of two nodes that are so far apart that their context windows don’t overlap. In this case the gap is marked as (...) in the respective context column in the export. If both context sizes are set to zero, the export will not contain any context columns at all (unless you use the query node filter, see below).
There is a special case in which you may want to treat a node matched by the query as part of the context rather than as a match: Some corpora contain annotations for larger spans such as clauses, which you may want to use as auxiliary nodes to express conditions on the nodes you are actually looking for. For instance, suppose we want to restrict the above query to matches contained within interrogative clauses:
pos=/N.*/ &
inflection=/.*GEN.*/ &
pos=/N.*/ &
clause=/.*_Int/ &
#1_=_#2 &
#1 . #3 &
#4_i_#1 &
#4_i_#3
Now the query contains four nodes, referred to as #1, #2, #3 and #4, which by default would all count as match nodes and would thus be included in a “Match” column. However, since one of the nodes, #4, represents the clause, this would include the entire clause in a “Match” column, hiding the information which nodes are actually matched by #1, #2 and #3. One could say that #4 is just an auxiliary node whose sole purpose is to express a condition on #1 and #3, namely that those are included in a clause with a certain property. In order to avoid treating #4 as a match node, you can use the “Query node filter” that defines which query nodes count as a match: Just click on the checkbox next to #4 to exclude it from the filter. Nodes that are part of the clause #4, but aren’t part of #1, #2 or #3, will now be treated as being part of the context.
Note: The left/right context size still refers to the context around all query nodes, not just the ones included in the query node filter.
In case the query node filter includes multiple nodes that may overlap, you can reorder the checked nodes by clicking on the button of an entry and then dragging it up or down. This defines a priority order between the nodes, so that when a segmentation node is part of multiple query nodes, it will be treated as being part of the first one according to the priority. Changing this priority order should not be necessary in most cases.
Match annotation

This produces a single column containing a particular annotation of one of the matched nodes. For instance, in the query
pos=/N.*/ &
inflection=/.*GEN.*/ &
pos=/N.*/ &
#1_=_#2 &
#1 . #3
the query node #1 is required to have a pos annotation with a value starting with N, but the exact value may vary. A “Match annotation” column helps you export this exact value. Under “Annotation”, you can select which annotation to export (pos in the example), and under “Query node”, you can select the query node for which you want to export the annotation (#1 pos=/N.*/ in the example).
The list under “Annotation” contains all annotations that are present in any of the selected corpora. If a match is contained in a corpus that doesn’t have the selected annotation, the column will be empty for that match. The same happens if the corpus does have the annotation, but the matched node doesn’t have a value for it.
You may notice that the list also contains “meta” annotations, i.e. annotations that refer to a document within the corpus or the entire corpus. This is because queries may not just refer to nodes that cover tokens of the text, but also to corpus or document nodes. If you want to export metadata on a corpus or document level regardless of whether the query refers to those nodes, use a “Corpus metadata” or “Document metadata” column instead, as described under Corpus/document metadata.
It may happen that a corpus contains multiple different annotations of the same name. For this case, ANNIS uses namespaces to disambiguate the annotations. In a query, an annotation can be referred to as namespace:name if necessary, or just name if the name is unique. The namespace can also be empty, in which case the annotation would always be referred to just by its name. For instance, in ReA there are two annotations called text, one under the default_ns namespace and one under the empty namespace. In the list under “Annotation”, you would find these as default_ns:text and text, respectively. In general, the list shows the namespace if necessary to disambiguate and omits it if the name is already unique (or the namespace is empty).
There is a special namespace called annis containing annotations whose meaning is defined by the ANNIS standard, as opposed to annotations whose meaning is defined by the particular corpora you’re querying. In order to make this distinction clear, the ANNIS standard annotations are shown at the end of the list under the “ANNIS” label. These annotations are mainly listed for completeness and will not be needed in most cases.
Note that strictly speaking, the selected annotation does not have to be exactly on the selected node in order to be exported. Consider the above example again:
pos=/N.*/ &
inflection=/.*GEN.*/ &
pos=/N.*/ &
#1_=_#2 &
#1 . #3
In a match for this query, the nodes matched by #1 and #2 are never the same, because ReA uses distinct nodes for the pos and inflection annotations. The condition #1_=_#2 just requires the two nodes to cover the same tokens, as opposed to #1 _ident_ #2, which would require them to be exactly the same node (and hence would yield no matches). However, if you configure a “Match annotation” column to export the inflection annotation of #1 pos=/N.*/, you still get a value. This is because in case the selected node doesn’t have the selected annotation, Annimate looks for the first node that satisfies these two conditions:
- Its token coverage overlaps with that of the selected node (
#1), and - it has a value for the selected annotation (
inflection).
Of course, in the example you can achieve the same by just selecting the query node #2 inflection=/.*GEN.*/ instead, but it is especially useful when you want to export an annotation that is not mentioned explicitly in the query. For instance, say you want to export the lemma annotation of the genitive node. Then you can select lemma and either #1 pos=/N.*/ or #2 inflection=/.*GEN.*/ and you will get a result despite the fact that neither of the two matched nodes actually has a value for lemma. This is because there is another node which is not mentioned in the query, whose token coverage overlaps (in fact, coincides with) that of #1 and #2 and which has a value for lemma.
Note that when your query is an “or” query with multiple alternatives, for technical reasons Annimate doesn’t know which of the alternatives actually applied for any particular match. This is why the list under “Query node” may show multiple nodes grouped in one entry. For instance, for the query
pos=/N.*/ | pos=/V.*/
you will just see a single entry showing #1 pos=/N.*/ and #2 pos=/V.*/ next to each other. The export for each match will then contain the selected annotation either for #1 or for #2, depending on which alternative applied for that particular match.
Corpus/document metadata


ANNIS corpora are subdivided into documents, which in turn contain the text nodes that you would typically search for. For example, the corpus/document structure of ReA looks like this:
ReA 1.2
├─ DDD-AD-Benediktiner_Regel_1.2
│  ├─ B_0
│  ├─ B_1
│     ...
├─ DDD-AD-Genesis_1.2
│  ├─ Gen_1
│  ├─ Gen_2
│     ...
├─ DDD-AD-Kleinere_Althochdeutsche_Denkmäler_1.2
│  ├─ AB_AltbairischeBeichte
│  ├─ AGB_AlemGlaubenundBeichte
│     ...
├─ DDD-AD-Kleinere_Altsächsische_Denkmäler_1.2
│  ├─ AN_AbecedariumNordmannicum
│  ├─ ASB_Altsaechsische_Beichte
      ...
Here, the items directly below ReA 1.2 such as DDD-AD-Benediktiner_Regel_1.2 are the corpora and the items below those such as B_0 are the documents.
Just like normal text nodes, corpus and document nodes can also have annotations. These are called meta annotations because they usually contain metadata about a corpus or document such as dialect, time or topic. It depends on the corpus which meta annotations are present at the corpus or document levels.
The “Corpus metadata” respectively “Document metadata” columns contain the value of the selected meta annotation for the corpus respectively document that each match is contained in.
The list under “Meta annotation” contains all meta annotations that are present in any of the selected corpora at the corpus or document levels, respectively. Like for “Match annotation”, annotations are disambiguated by showing their namespaces if necessary and ANNIS standard annotations are shown at the end under the “ANNIS” label (see Match annotation for details). For documents, the ANNIS standard annotation doc (or annis:doc) contains the document name such as AB_AltbairischeBeichte. As this annotation is always present for documents (in fact, the presence of this annotation is what technically defines a document), it is especially useful in cases where there’s no corpus-specific annotation containing the document name. For ReA, you may want to use the text annotation instead.
Note: It may happen that the same meta annotation can be found at the corpus level for some corpora, but at the document level for others. In ReA, for instance, annotations such as
dialect,timeortopicare usually maintained at the corpus level, except for the two corporaDDD-AD-Kleinere_Althochdeutsche_Denkmäler_1.2andDDD-AD-Kleinere_Altsächsische_Denkmäler_1.2, where they are maintained for each individual document. This is because these two corpora are heterogeneous collections of documents with different values for those meta annotations, while the other corpora are more homogeneous, so the meta annotations can be maintained at the corpus level. You may want to add both a “Corpus metadata” and a “Document metadata” column for the same annotation in order to make sure that your export covers both cases.
Working With Projects
Since exporting query results requires you to configure quite a few parameters as explained in the previous chapter, you may want to save this configuration and load it back into Annimate later. This can be useful in several cases:
- You want to save the current state of your work, so that you can come back to it later.
- You want to document your work for later reference.
- You want to enable others to reproduce or collaborate on your work.
Annimate supports all of these scenarios through a feature called projects. A project file is a file with the .anmt extension that contains a snapshot of an Annimate configuration. You can save your current configuration as a project file and load a configuration from an existing project file into Annimate.
Saving a Project
You can save your current configuration as a project file as follows:
- Click on “File”, then select “Save project as …”.
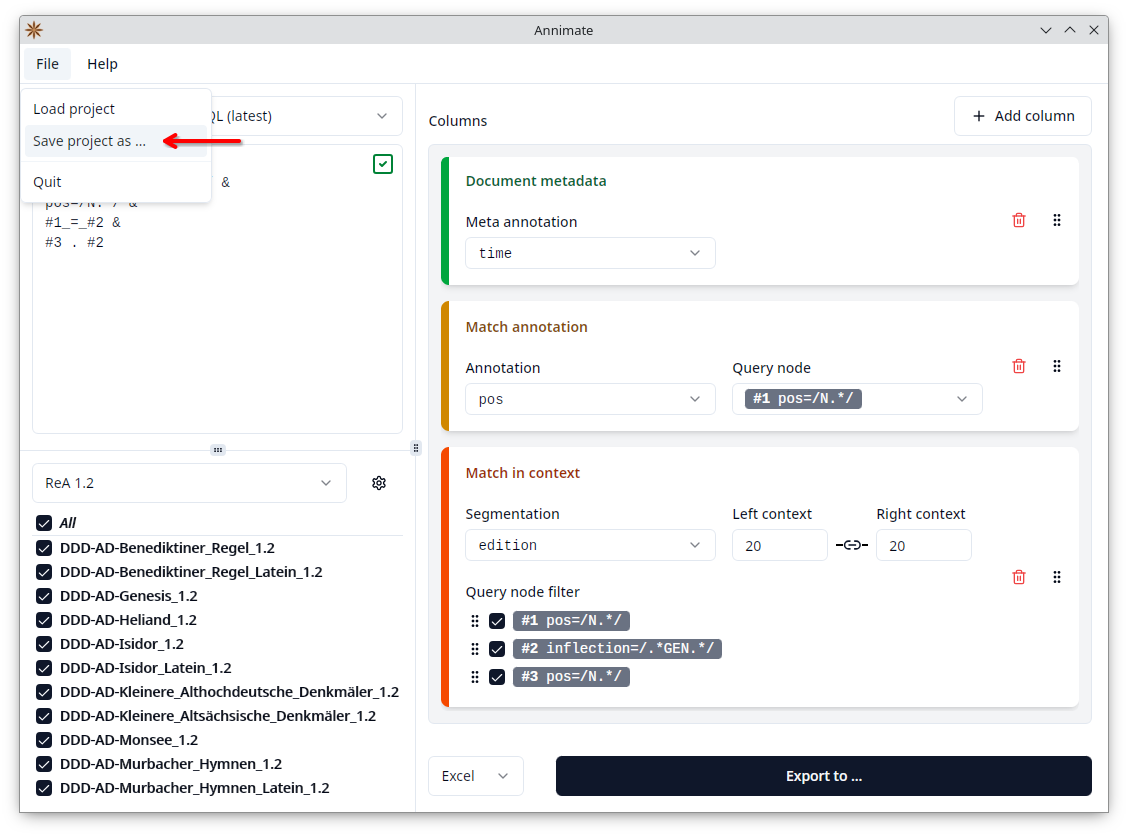
- Select a filename for your project.
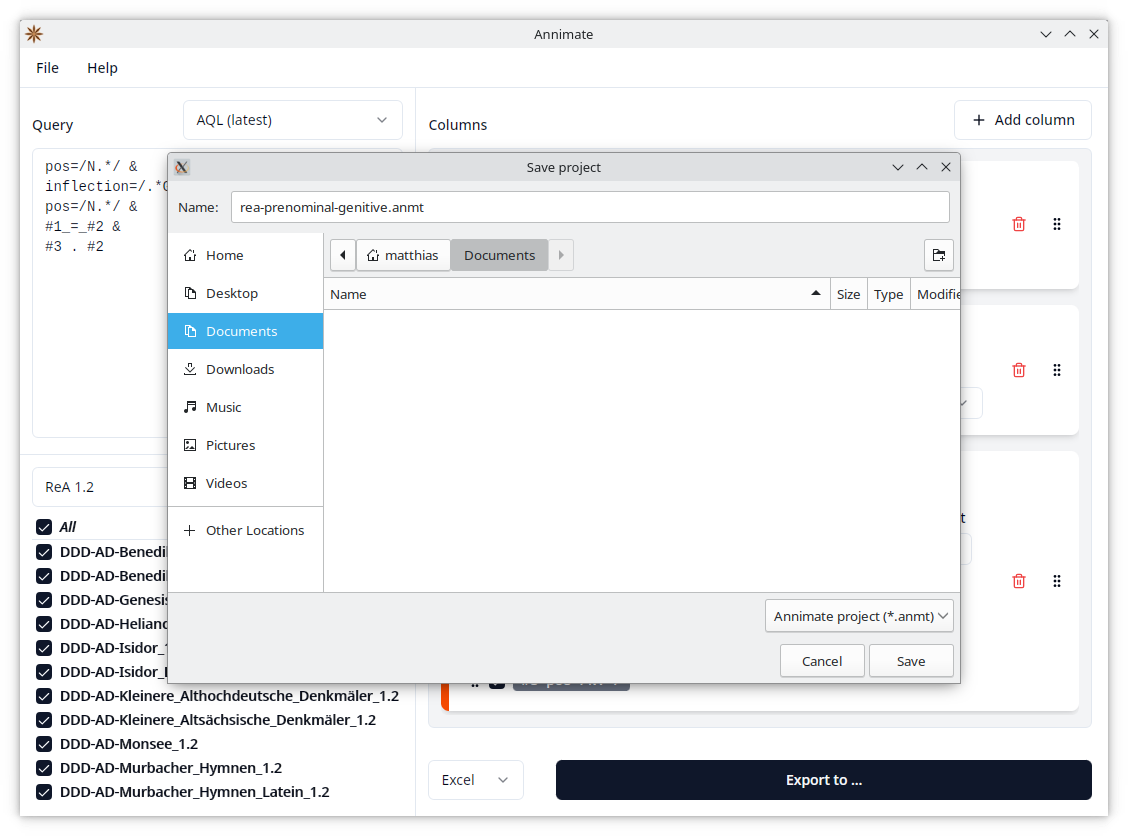
The following parameters will be saved if available:
- The selected corpus set
- The selected corpora
- The entered query
- The selected version of the ANNIS Query Language: AQL (latest) or AQL (compatibility mode)
- The configured table columns including all selected parameters such as annotations
- The selected export format: CSV or Excel
Note that you can save your current configuration in any state, regardless of whether it is valid for export or not.
Loading a Project
You can load a configuration from an existing project file into Annimate as follows:
- Click on “File”, then select “Load project”.
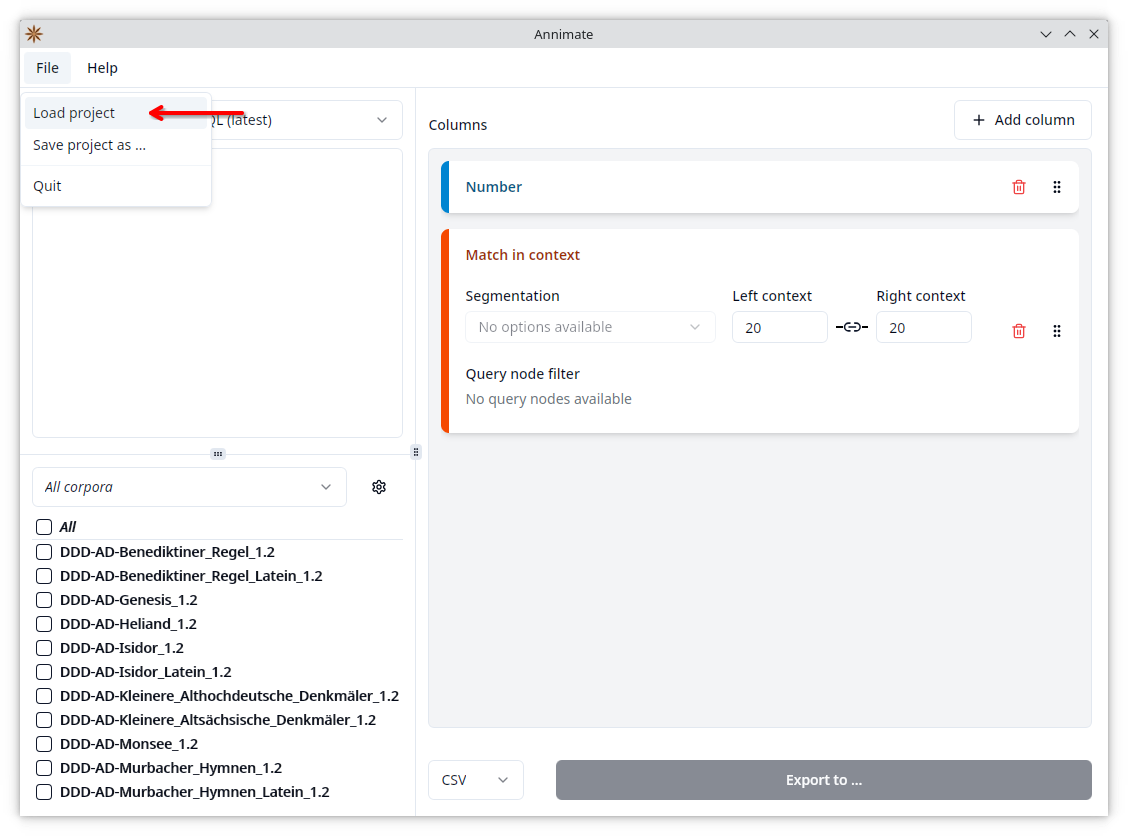
- Select an existing project file.
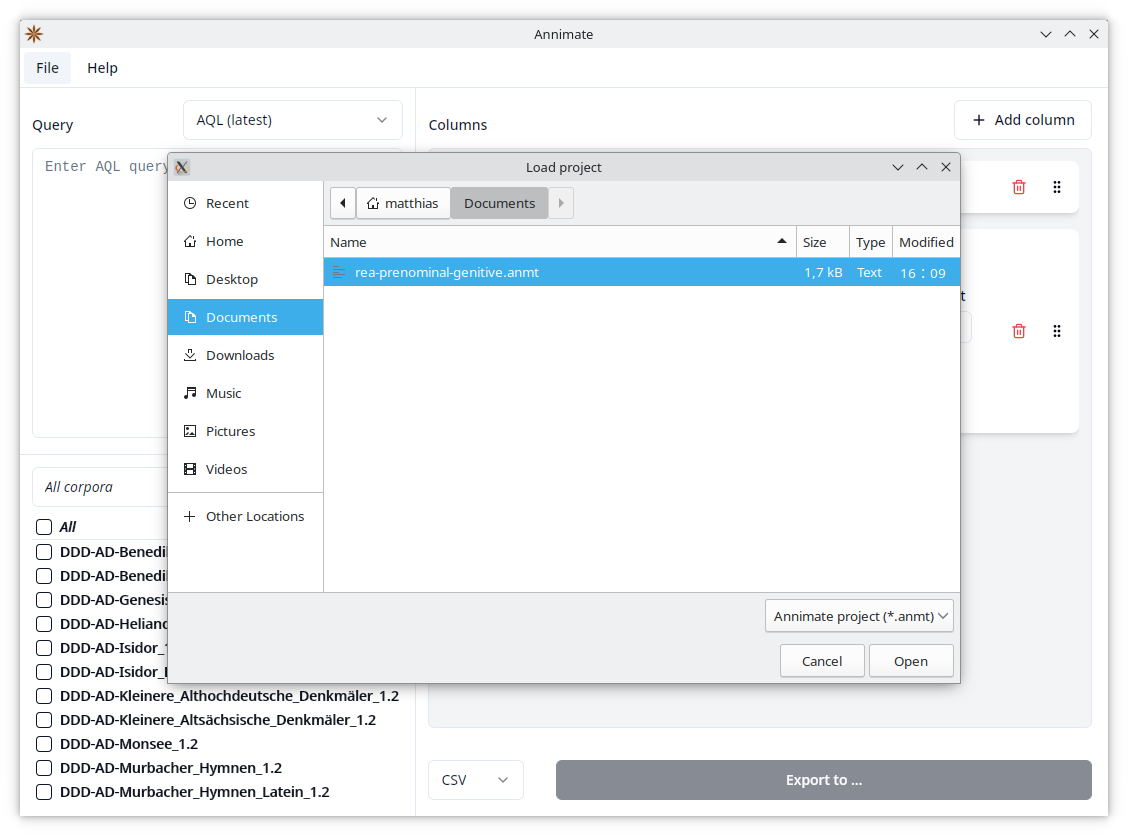
This will load all of the parameters listed above into Annimate.
Loading a project will discard your current configuration. In order to keep it for later use, make sure to save it to another project file first.
Note: While a project file contains all of the parameters necessary for exporting query results, it does not include the actual corpus data. If you load a project referencing a corpus that does not exist in your installation of Annimate, you will see a warning message and only those corpora that do exist are selected. Note that this can lead to a state where some parameter selections included in the project file are not visible, for instance when the project file references an annotation (as part of a configured table column) that does not exist in the selected corpora.
File Format
Annimate project files use the .anmt file extension. While their main purpose is to be loaded into Annimate, they can also be opened using any standard text editor. The file format is human-readable and mostly self explaining, so that project files can be used for documentation purposes even when an installation of Annimate is not available.
Technical Note: Annimate project files currently use the TOML file format. The details of the format are not guaranteed to remain stable across different versions of Annimate, but future versions will be backward compatible in the sense that they will still be able to read older project files.
The file format is deterministic, i.e. saving the same state twice produces identical files. This makes project files suitable for checking them into version control systems such as Git.
What’s Next?
Have fun with Annimate! If you encounter any problems, check out the Troubleshooting section. Let us know in case you need support.
Troubleshooting
This is a collection of common issues you might encounter while using Annimate. If you cannot find a solution to your problem here, feel free to file an issue on GitHub.
Installation
On macOS, there is an error message saying that Annimate is damaged
If you see an error message like this when trying to start Annimate on macOS:
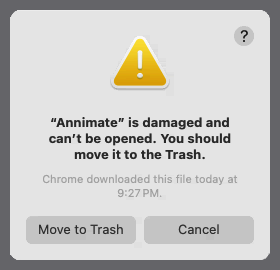
this is because Annimate has not been signed by Apple.
To fix this, make sure that you remove the “quarantine” attribute as described in the Installation section.
On Linux, there is a “permission denied” error when trying to install an update
If you see an error message like this when Annimate tries to install an update on Linux (instead of os error 13, it could also show os error 1):
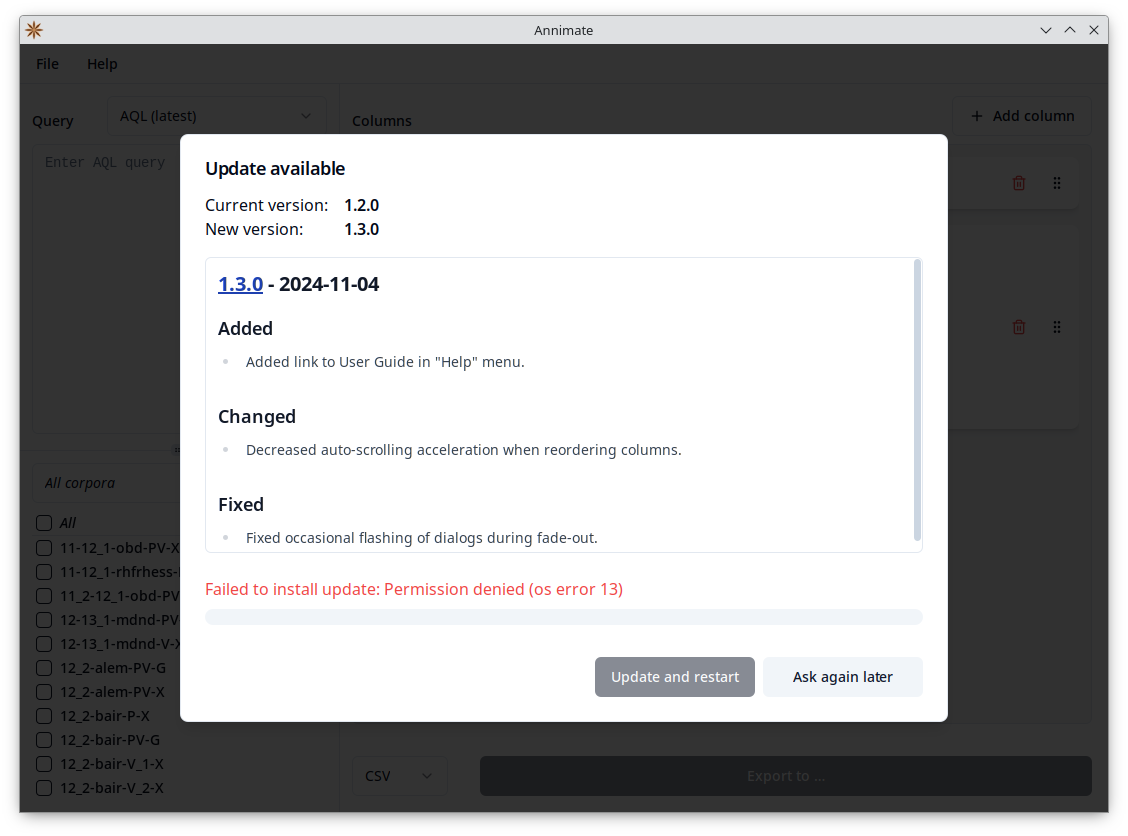
this is because the current user has no permission to write to the folder containing the Annimate AppImage. To fix this, you may assign the necessary permissions by running
chmod u+w <folder containing the .appimage file>
In any case, instead of letting Annimate update itself, you can alternatively just download and run the latest release.
Note: Your imported corpora are persisted across updates and will not be lost even if you install a newer version manually.
Exporting Query Results
Match in context: Desired segmentation is not listed
If your desired segmentation layer is not listed under “Segmentation” in a Match in context box, this may be because not all of the selected corpora contain the segmentation. You can confirm this by selecting just a single corpus (try different ones from the list) and checking if the segmentation appears.
To fix this, you may want to group your corpora differently, so that all corpora in a set contain the same segmentations. Alternatively, you can use different segmentations for different subsets of corpora by doing separate exports.
Match in context: Columns are empty
If the Match in context columns in your CSV or Excel file are empty, this may be because you selected the Tokens (default) segmentation, but your corpus uses virtual tokens. This means that the segmentation nodes on the token layer do not have any textual content (hence the empty columns), but just serve the purpose of aligning other segmentation layers.
To fix this, try choosing an option different from Tokens (default) under “Segmentation”. If there is no other option, check out the previous point.
Match in context: Context window is smaller than expected
If the “Context” columns in your CSV or Excel file contain fewer segmentation nodes than expected, this may be because you selected a non-standard segmentation where the context size cannot be measured in segmentation nodes for technical reasons and is measured in tokens instead.
To fix this, increase the context size as needed.
Corpus/document metadata: Column is empty
If a Corpus/document metadata column in your CSV or Excel file is empty, this may be because the selected meta annotation is present on a different level than you configured. For instance, you may have configured a “Document metadata” column, but the selected annotation may actually be present at the corpus level.
To fix this, add both a “Corpus metadata” and a “Document metadata” column for the same annotation and check if you get any data in either column. You may even get data in one column for some matches and in the other column for other matches, as explained in the Note in Corpus/document metadata.
The “Export to …” button is disabled
If the “Export to …” button is disabled (grayed out), this means that the information needed to start the export is still incomplete.
To fix this, hover over the blue information icon next to the button with your mouse to see what’s missing, and make sure that the following conditions are satisfied:
- At least one corpus is selected.
- A query has been entered and is valid (showing a green checkmark).
- At least one column has been configured.
- All configured columns have all their fields set to a value (Segmentation, Left/right context, Annotation, Query node, Meta annotation)
Note: If you change the selection of corpora and/or the query after you have already configured the columns, it can happen that a previously selected option is no longer available (e.g. for “Query node” if you change the query so that the selected node no longer exists). Then the selection is cleared and the “Export to …” button becomes disabled. In this case, go through the list of columns again and make sure that all fields are filled.
Links
Annimate
ANNIS
Other Software
For other ANNIS-related software, see corpus-tools.org. There you will find these tools, among others:
- Annatto: Tool for conversion and manipulation of linguistic data, based on the graphANNIS representation
- graphANNIS: The library underlying ANNIS, Annimate and Annatto
- Pepper (Legacy): Platform for conversion and manipulation of linguistic data, supports the relANNIS format
Corpora
Repository containing data for many corpora:
- LAUDATIO: Long-term Access and Usage of Deeply Annotated Information
Reference corpora of historical German (see Deutsch Diachron Digital for an overview):
* Note that the two versions of ReM cannot be kept imported in Annimate at the same time, because the corpora have identical names, see the Note in Importing Corpus Data.
